THE TAKE HOME KIT
After getting parents on board with my simple Fine Motor Parent Pamphlet, the next thing I like to do is to have a couple of Fine Motor Home Kits made up. These are simple, little inexpensive kits that students take home for two weeks and then bring back to me. This post contains affiliate product links.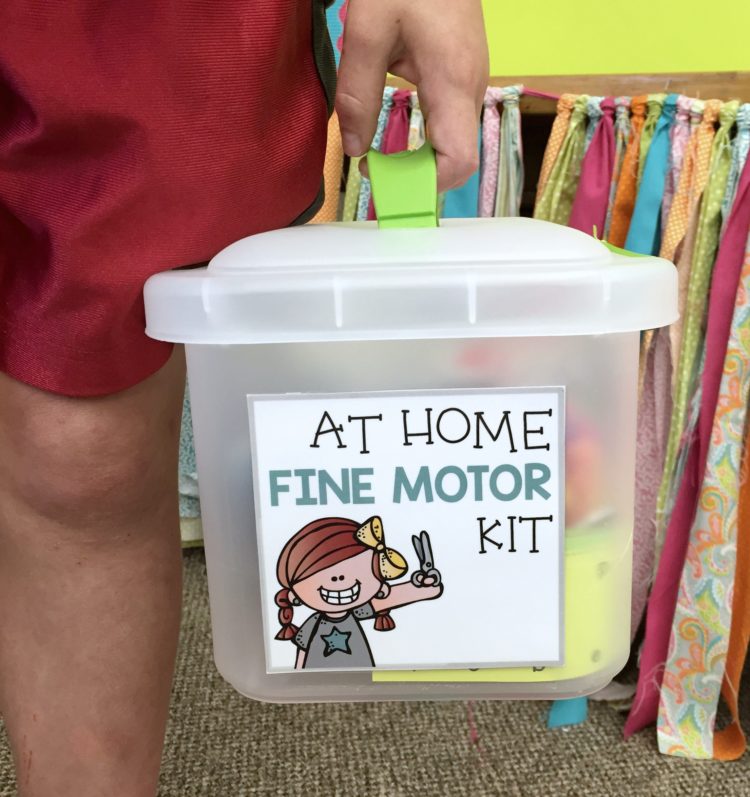

KIT ACTIVITIES
All the activities fit inside my little Steralite Carry Tote, safe and snug. It’s small enough for little ones to carry on their own or pop in their backpacks, but big enough to hold everything I need.POPPER BEADS
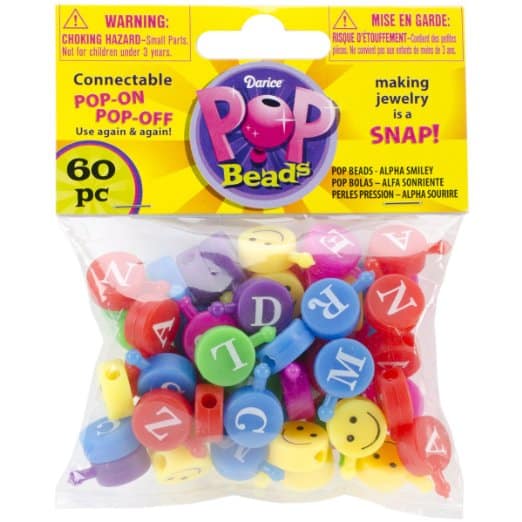
I like to include popper beads in my kit because they are engaging, colorful and, most of all, boys and girls alike enjoy using them so I know it will be an activity they want to do.
PUNCH A LETTER SOUND
Paper hole punches are the ‘great silencer.’ No kidding! If you want a room full of quiet kinders, hand them each a paper hold punch. (I actually have a class set.) Just punching holes in a piece of paper is somehow mesmerizing to them and, at the same time, such a great tool for building those grasping muscles. I’ve included the added challenge of ‘punching out letter sounds’ as part of the kit’s hole punch activity. Students look at the pictures on the strip of paper, identify the beginning letter sound, and ‘punch out’ any letters that are not the beginning letter sound.
BULB SYRINGE RACES
Bulb syringes can be found in the baby section of your local department or dollar store. They are super cheap and a ton of fun. If you’d like, you can change a syringe for a turkey baster, and it has the same effect.

TENNIS BALL MUNCHY MOUTHS
Until recently, I always made these munchy mouth tennis monsters with your run of the mill, everyday yellow-green tennis balls. But then a friend told me about these oh-so-cute animal print tennis balls that are actually for dogs, and I knew my kinders would go crazy for them.
PLASTIC LINKS AND NUMBERS
Without anything added, plastic links make a great fine motor activity. Students love to see how long they can get their chains and often make a challenge for themselves by including intricate color patterns. But if you add a few number cards with hole punches, it takes this activity to another level.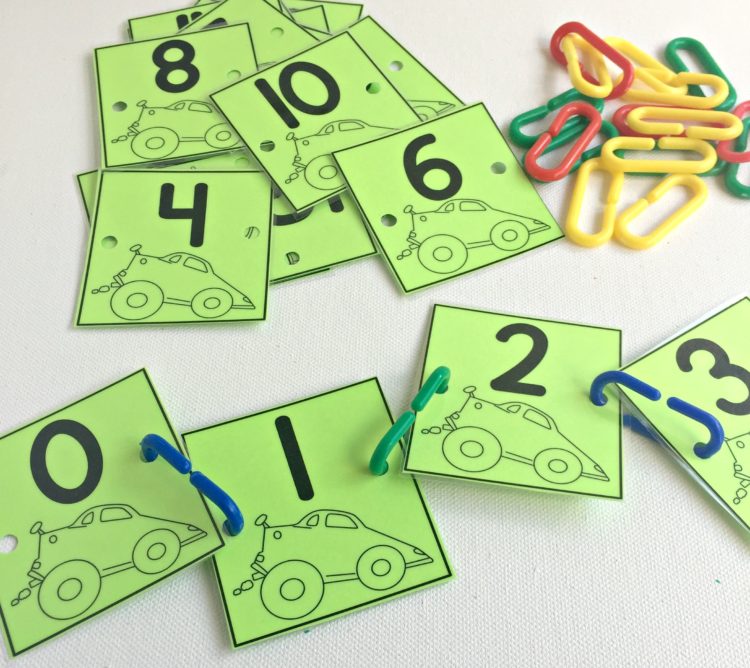
PLAY-DOH EXTRUDERS AND LETTERS
If you have an arsenal of play-doh extruders like the one below, you know how much your students love working that plunger with their fingers to push that dough through the different shapes. Although parents often poo-poo play-doh as being too messy, it’s one of the best tools for working those little hand muscles. Add a pair of scissors to snip of the extruded play-doh and it adds a nice resistance tot he activity. If you parents grimace when you give them activity, remind them of the importance of those finger muscles when their child starts writing and suggest they have them work on a small cookie sheet to control the excess play-doh pieces.

RICE BOWL SEARCH
Mini erasers are tiny and tough to grab hold of which makes them a perfect addition to my fine motor kit. Here I use a small disposable container to house some colorful dyed rice and in the rice bowl is hidden some more of those fun mini erasers you can find at Oriental Trading. (One order goes a long way, but I tend to by lots of different thematic ones.)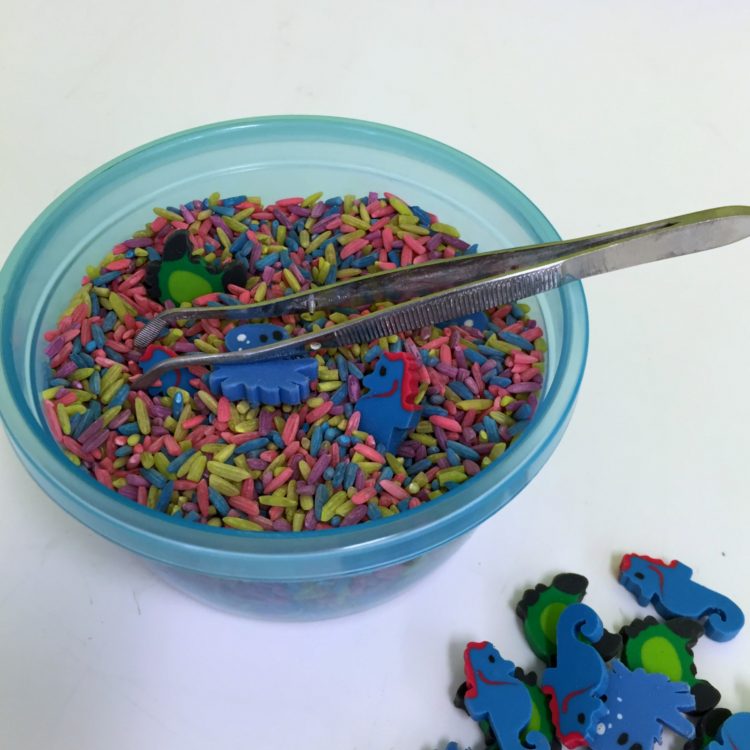
THERAPY PUTTY SEARCH AND SPELL
While you can use other putty for this activity, I’m always partial to therapy putty just because . . . well . . . it really is the best. It has the right amount of resistance and it’s super stiff which you really want. I especially like it, because it lasts forever. Sure you can use something like Silly Putty in its place, but I find that I would have to purchase 3 or 4 containers of Silly Putty to equal what I can get from one container of therapy putty. For this kit activity, I like to hide beads, colored pony beads or even letter beads if you have them, inside the putty. Students can search the putty, naming the letters as they find them, or you can see if they can use the letters to make words or spell their name.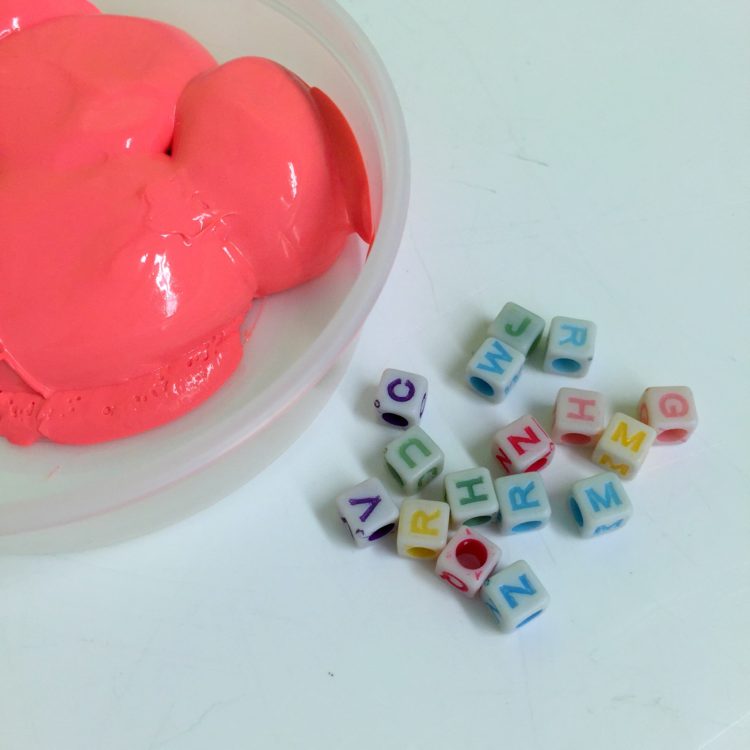
NUTS AND BOLTS
Hands down one of the most favorite activities of all fine motor kits that I can offer a student. There is just something about nuts and bolts. You can use the plastic, toy kind of nuts and bolts if you prefer. It still will engage your students hands in grasping and turning, but I tend to prefer a variety of shapes and sizes of the ‘real thing.’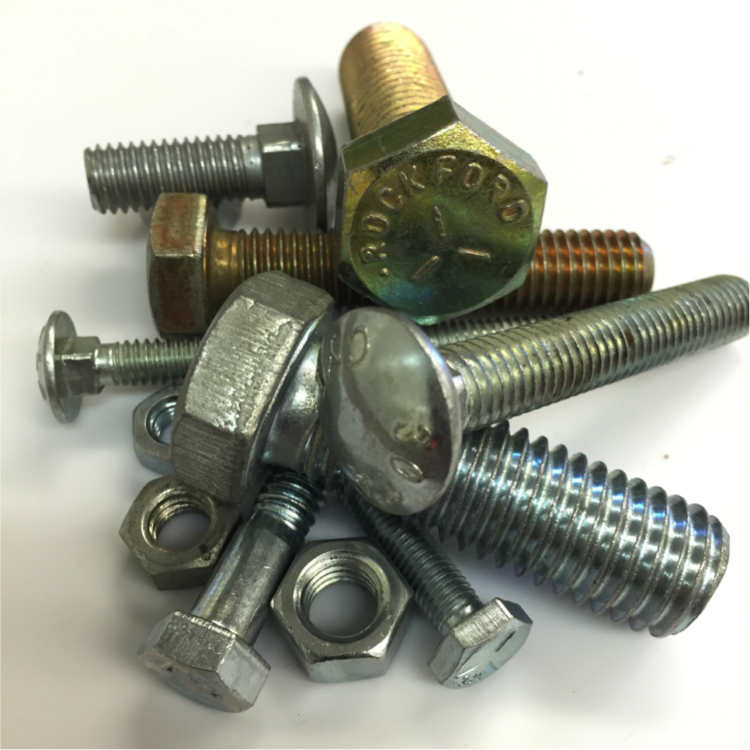
PUNCHING NUMBERS
Button type paper punches are also a good way to build up fine motor strength while engaging your students. Just punching the paper is really a challenge. But if you’d like to add a spin to it, label several different sheets of colored Astrobrights paper (colored paper makes everything more fun) with a number and have students ‘punch’ that many times.
 Enjoy!
