I have had a multitude of questions from readers this week about how they can extract specific pages from one of my PDFs to use for online learning. I’m hoping I can answer a few of those questions here.
Extracting Pages From a PDF File
I know that you are all used to being able to just print off the documents you need at school, right? But what should you do when you only want to use one page from a document to send to students. How can you extract just that one page? Unfortunately, as product creators, we are obligated to protect the clipart we use in our products. Clip artists, understandably, do not want just anyone to be able to collect their clipart from unsecured files. You may have found files that you can extract without a password, and all I can say is, the teacher-author is probably ignoring the Terms of Use laid out by the clip artist from whom they purchased their clipart. I prefer to honor Terms of Use to the best of my abilities because I love my clip artist friends and respect their work. But there is a way that we can get around the whole, ‘password needed’ thing and still keep the clipart secure and safe.
Here are a few steps that might help. I have a Mac so my computer may be a bit different, but it will give you the right idea. There are actually two different ways to do this on a Mac. I’m going to show you both.
I do have some instructions for PC users that follow these steps, so scroll down. For this example, I’m using an Edit It – Color By Sight Word Freebie. If you’d like to grab this for yourself, just go HERE.
MAC OPTION #1
Step 1
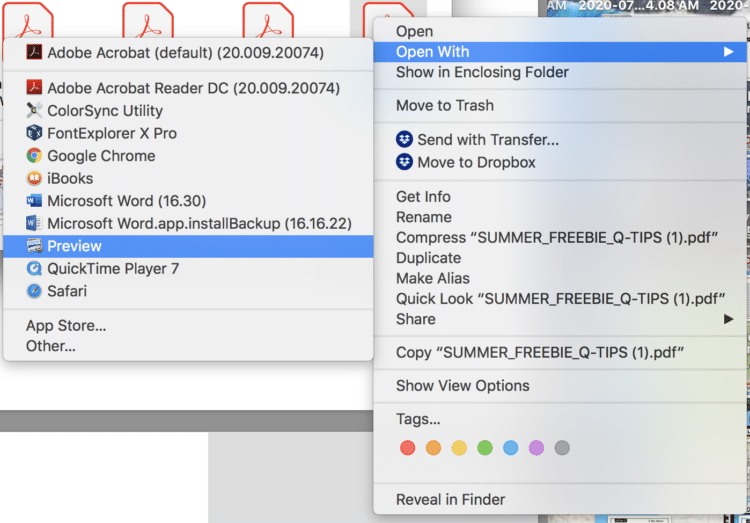
Select the PDF that you would like to extract pages from and open it using PREVIEW.
Step #2
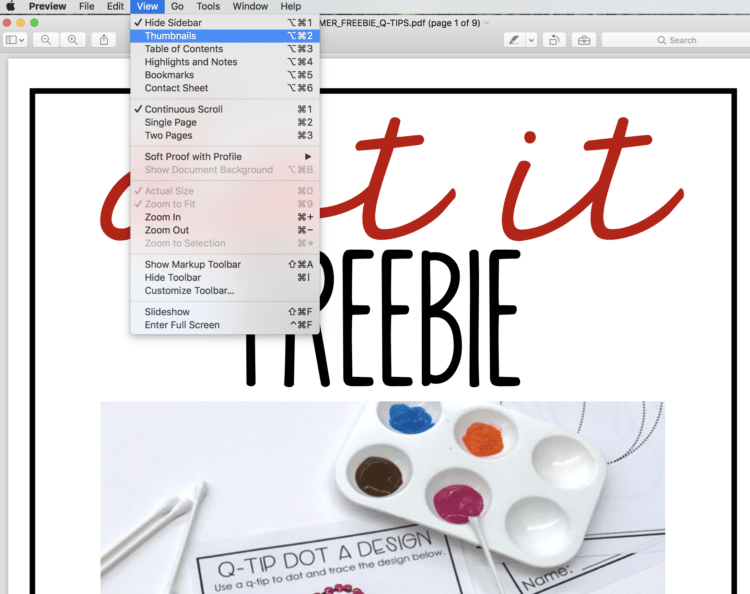
Select ‘View’ and then ‘Thumbnails’ if you don’t already see your thumbnails.
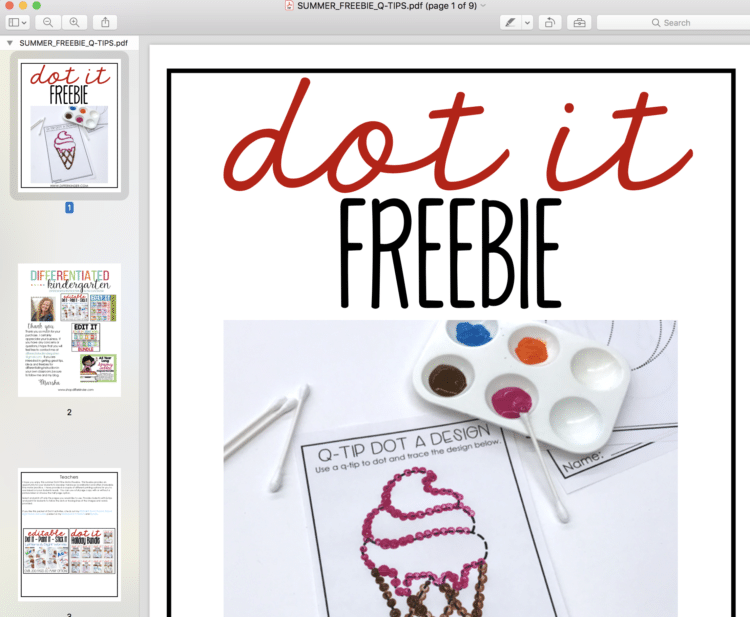
And now you’ll see your thumbnails.
Step 3
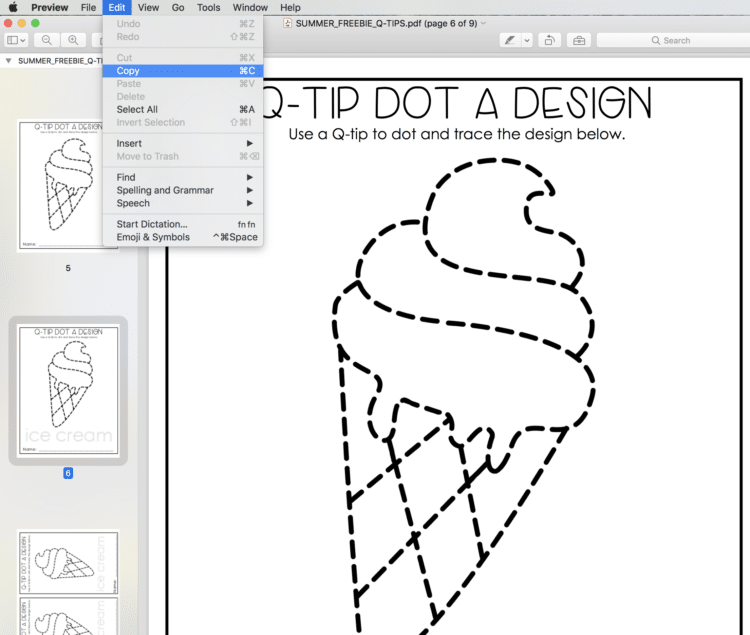
Select the page you want to extract by clicking on it. Then go to ‘Edit’ and select ‘copy’.
Step 4
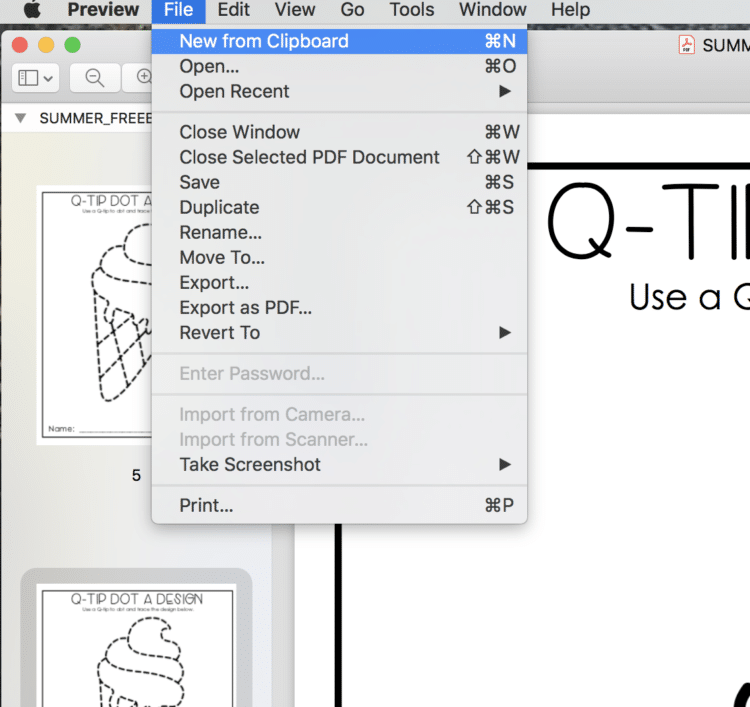
Now that you have copied it, go up to File and click ‘New from Clipboard’
Step 5
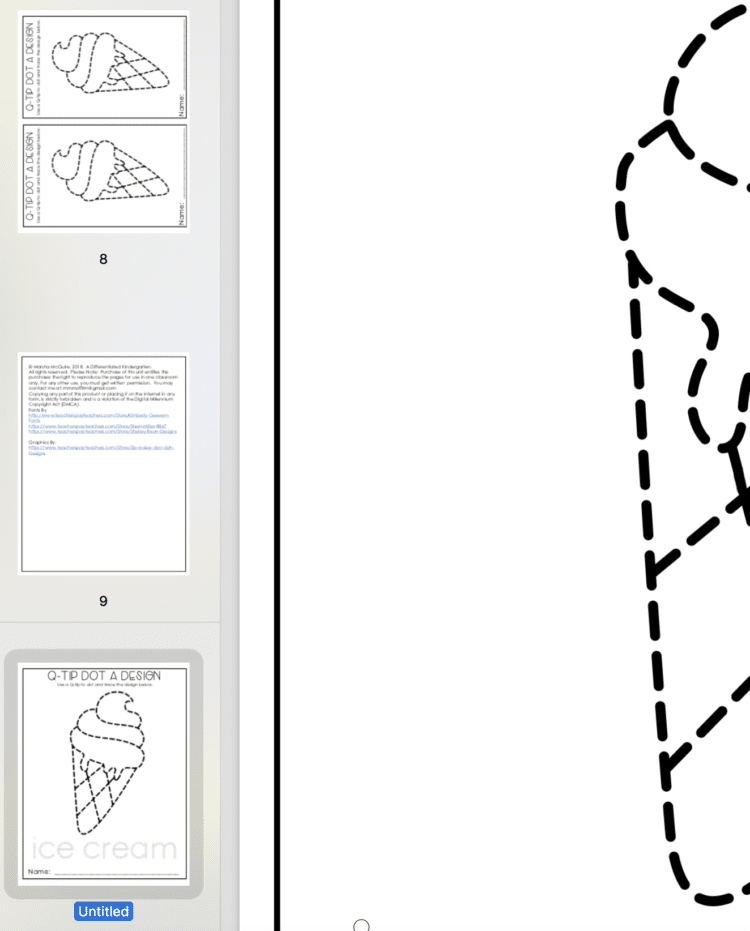
Once you hit that, you will find your page at the bottom of you thumbnails labeled as ‘untitled.’
Step 6
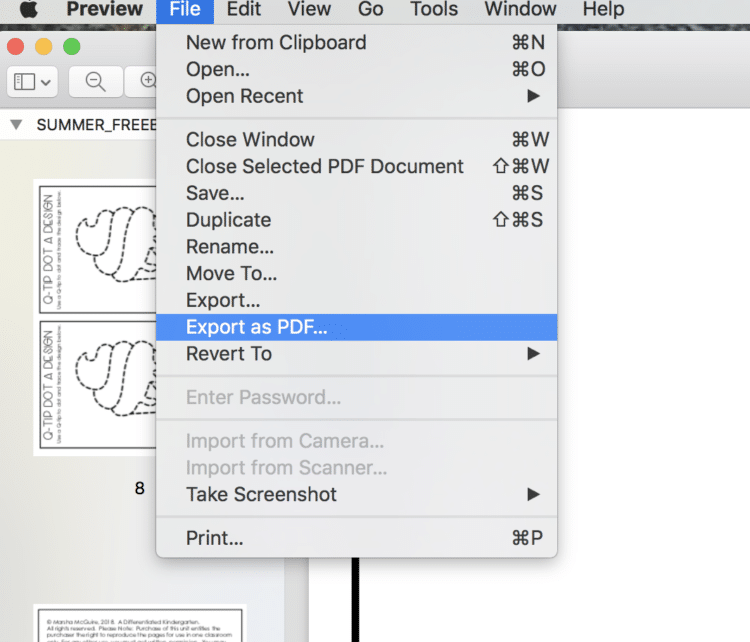
Make sure it is selected (it should already be) and then go up to file and select Export as a PDF.
Step 7
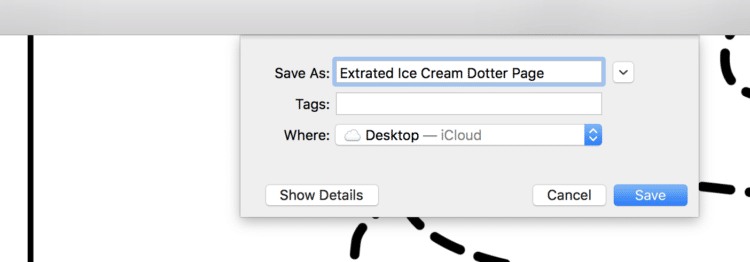
Name it and put it where you can find it.
And that’s it.
It’s super simple right. But just in case you need another option . . .
MAC OPTION #2
Step 1
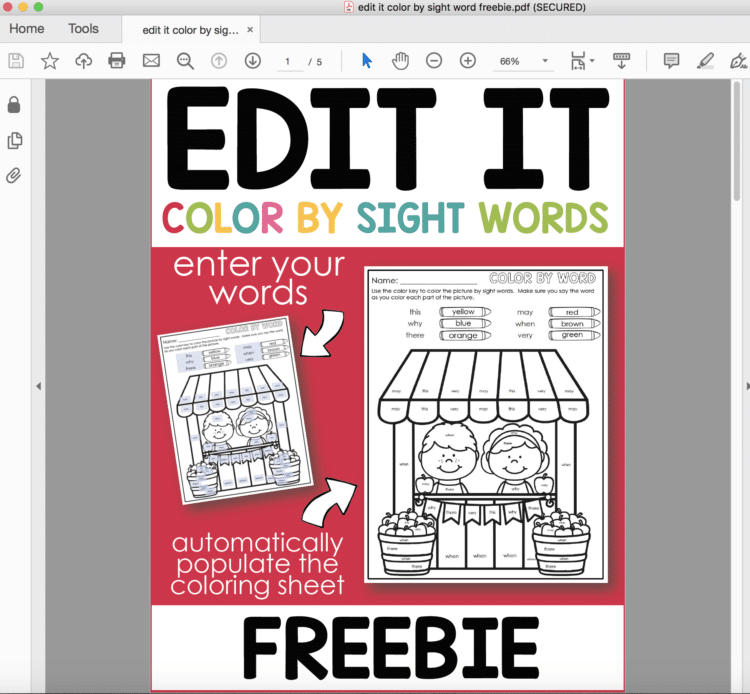
So let’s say, for example, you want to enter specific sight words into a color by sight word editable packet. Of course, you are going to open this packet using Adobe Reader to enter your words in the designated area first.
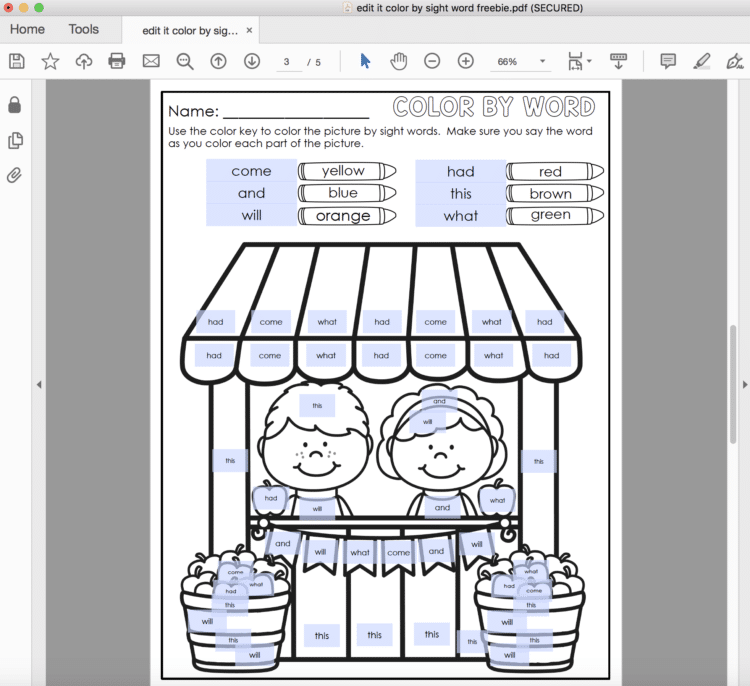
Step 2
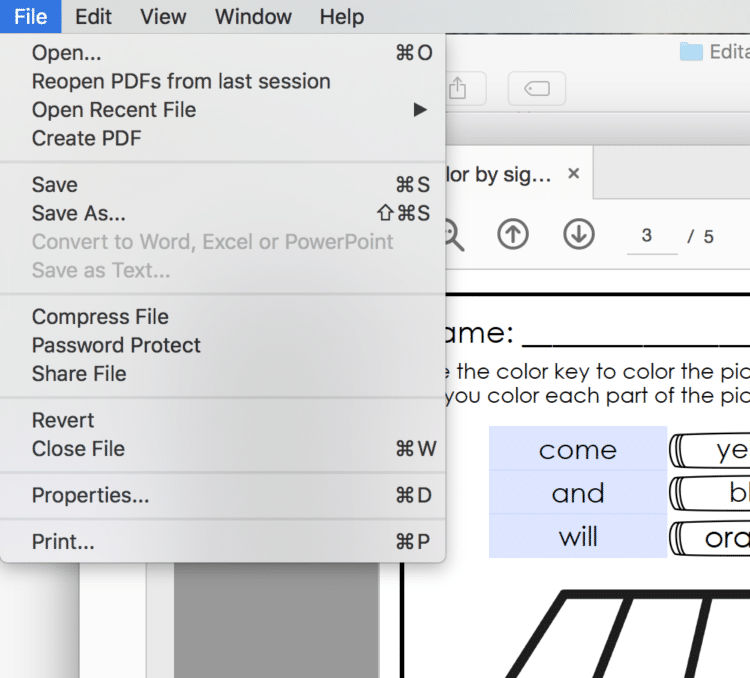
Once you have your words entered, save the document under a new name using the SAVE AS command.
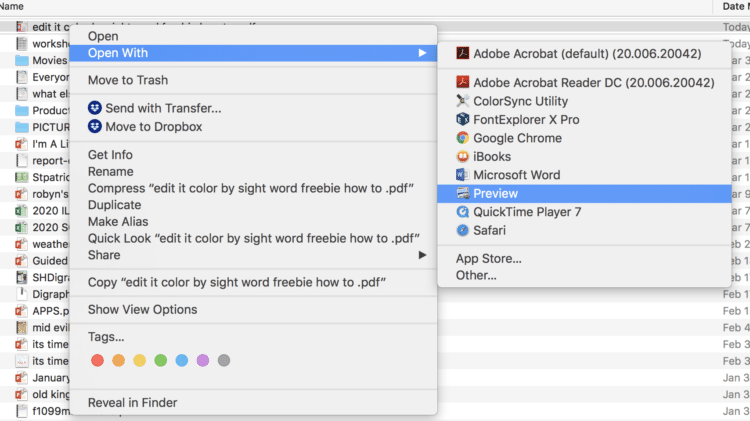
Step 3
Now go find that saved file and right-click on it. It should give you the option to ‘Open with . . .’ or ‘Open using,’ and when you click on that, choose to open using PREVIEW
Step 4
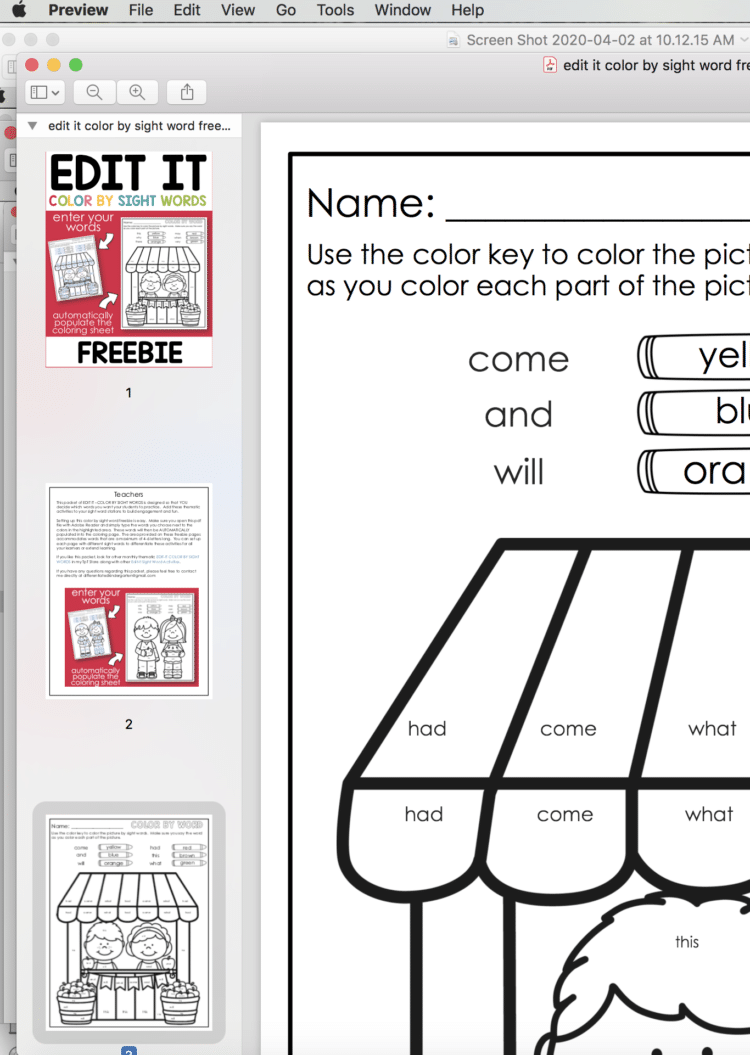
Select the page your would like to extract by clicking on it.
Step 5
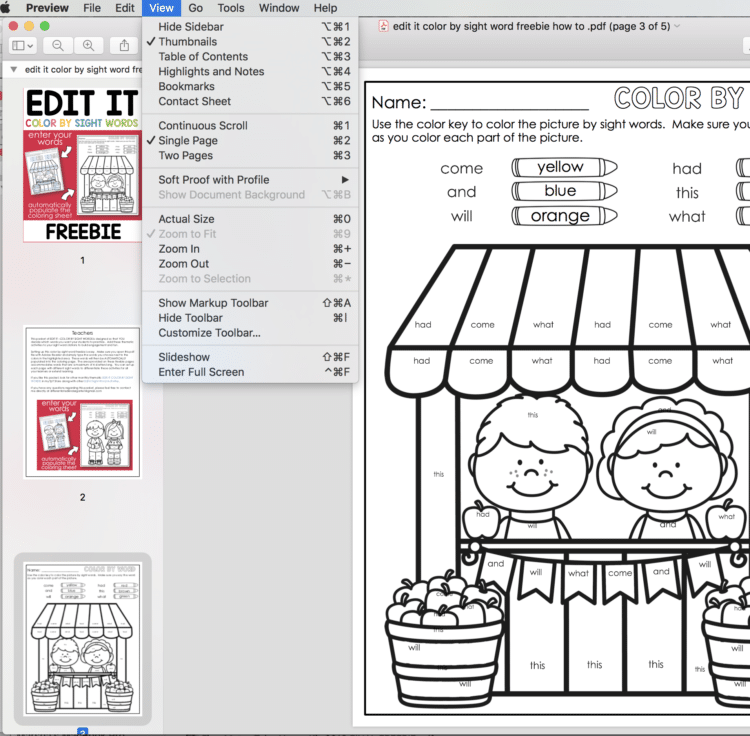
Choose to view Single Page
Step 6
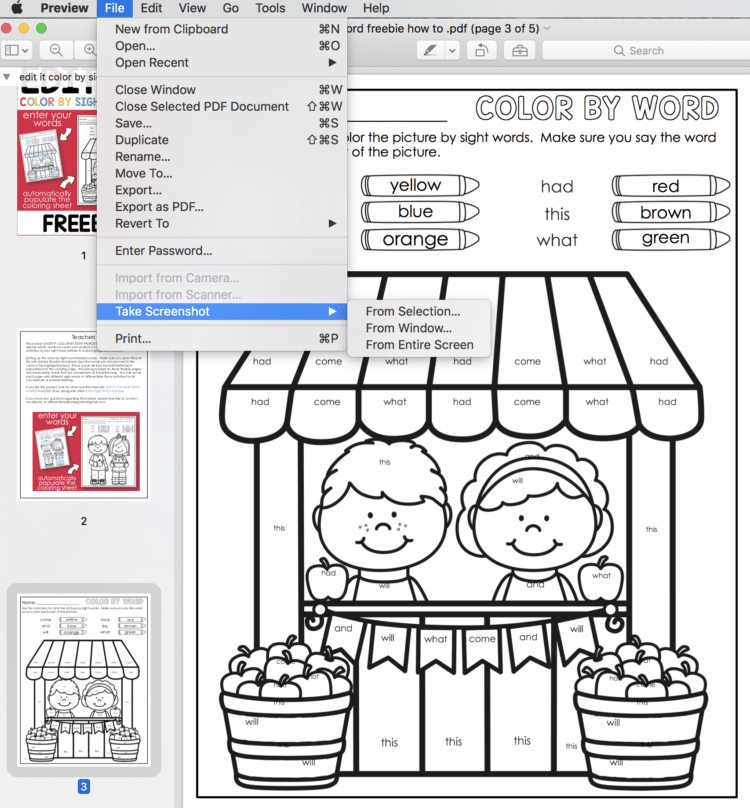
Next, click on File and select ‘Take a Screenshot.’ You will want to use the ‘From Selection.’ It will give you a + curser. Start from one corner of the page and drag to the other to take a picture of the document. (You can also use the ‘snippet’ tool in on a PC!)
Step 7
Find the image you just took a picture of (it is usually located on your desktop) and click on it. Choose the File option and you will be able to save the picture as something else. Choose a new name and click the drop-down menu to select save as a PDF.
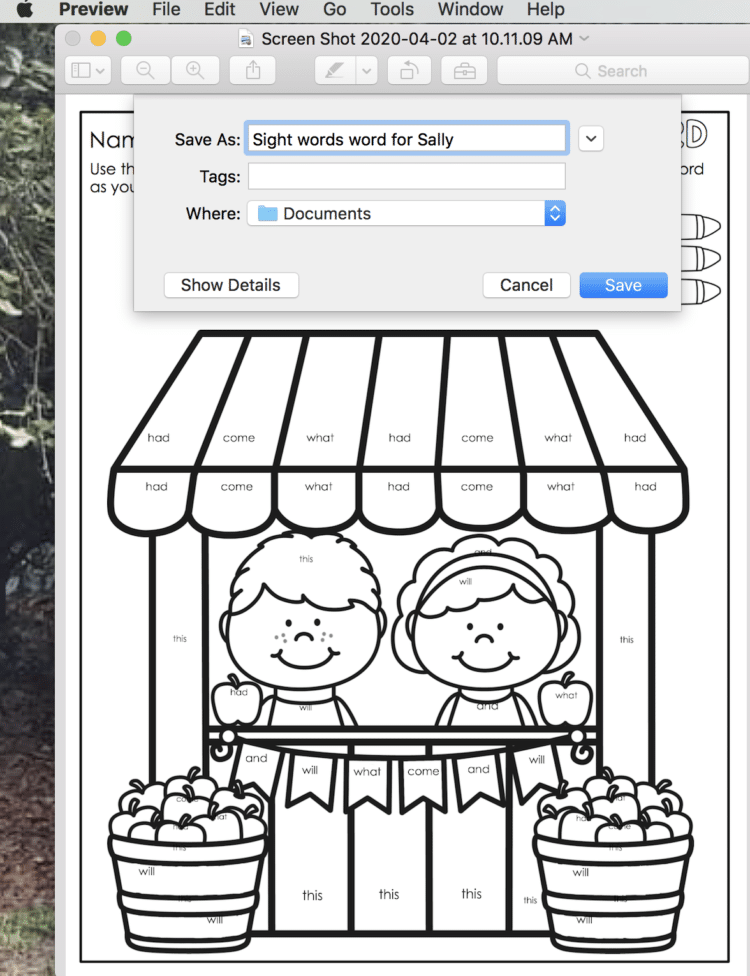
You now have an extracted PDF that you can send to your students.
PC USERS
If you’re using a PC, the steps below may work for you. It was sent to me by a reader. You can try it out.
- Open the resource you wish to use.
- Click the Print and select pages you would like to include to be extracted.
- When you see PRINTER, click on the drop-down menu and make sure you choose the option for PRINT TO PDF.
- Now click Print. This will bring up a screen that prompts you to make the file with a new name.
- Now print this file.
I don’t have a PC so I can’t attest to this method, but it’s worth a try. You can check out my friend Anne’s post HERE.
Merging single PDF pages that are both landscape and portrait.
The best advice I can give you for merging various-shaped pdfs is to go to a free website called PDF Candy.
Select the Merge option and it will have you drag the pages you want right there and merge them together. So simple!
Making Printables Google-Friendly
The other question folks are asking is ‘how can I make a printable distance learning-friendly’ so students can respond right on the document and send it back to me digitally? So I’m going to show you how you can make printables Google Classroom-friendly.
Step 1
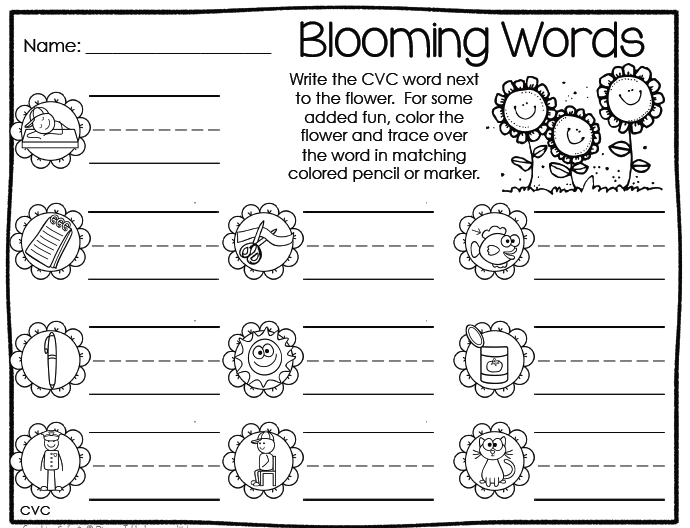
Select the item you would like to have your students interact with and collect a screenshot of it. I’m using a page from my ‘First Grade Here I Come’ No Fuss No Muss packet. You can find that HERE.
Step 2
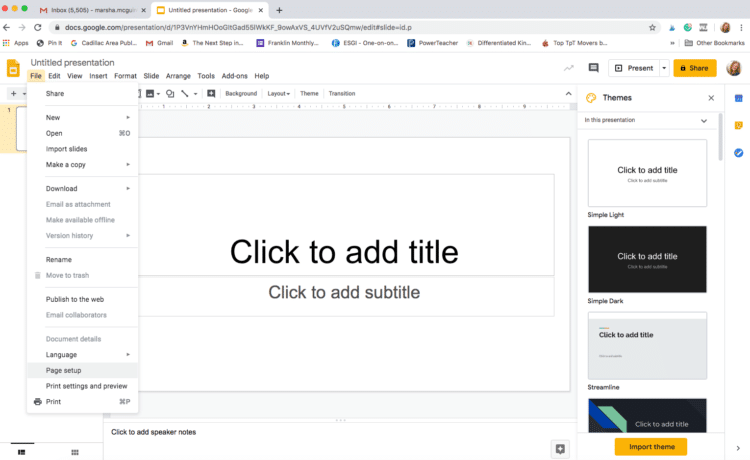
Open up Google Slides and select ‘start a new presentation.’ Click Page Setup.
Step 3
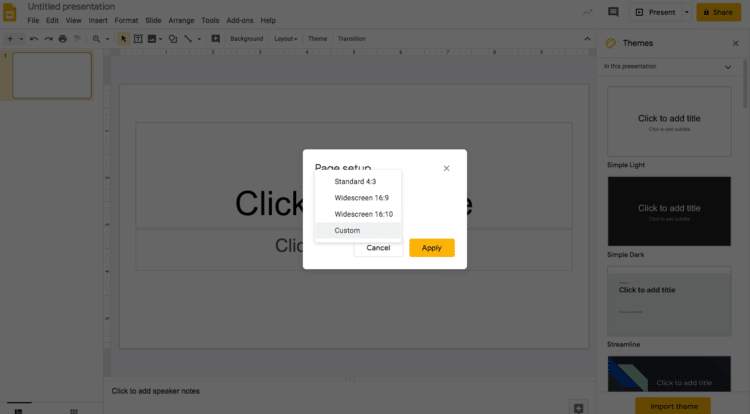
Select the custom option to size the page according to the page you selected. In this case 11 x 8.5
Step 4
Once you have the page set up to the correct size, select ‘background.’
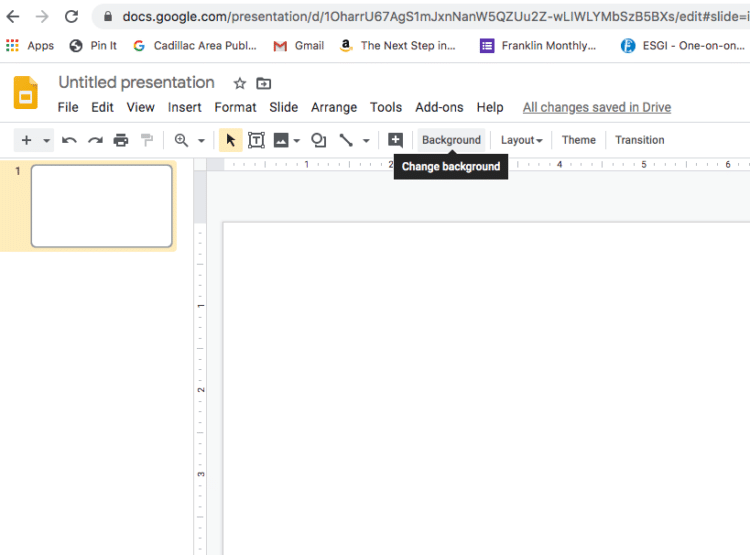
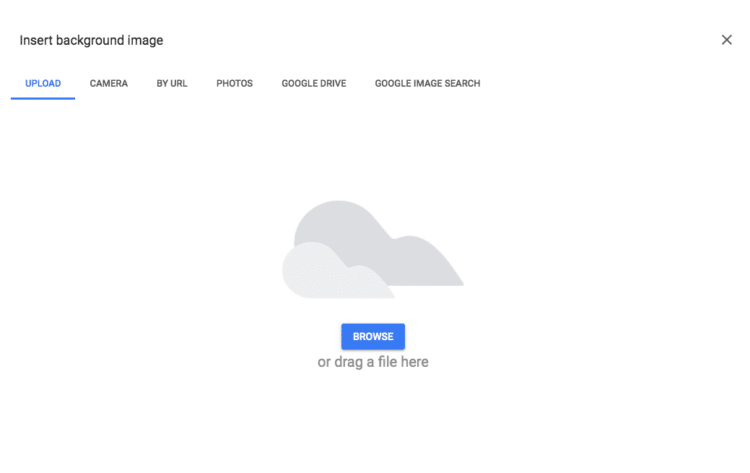
And select ‘choose image.’
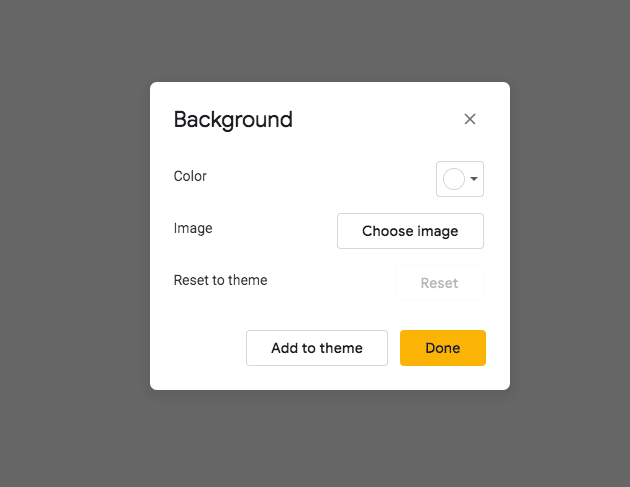
Step 5
Now find the screenshot image of the page you selected.
And done
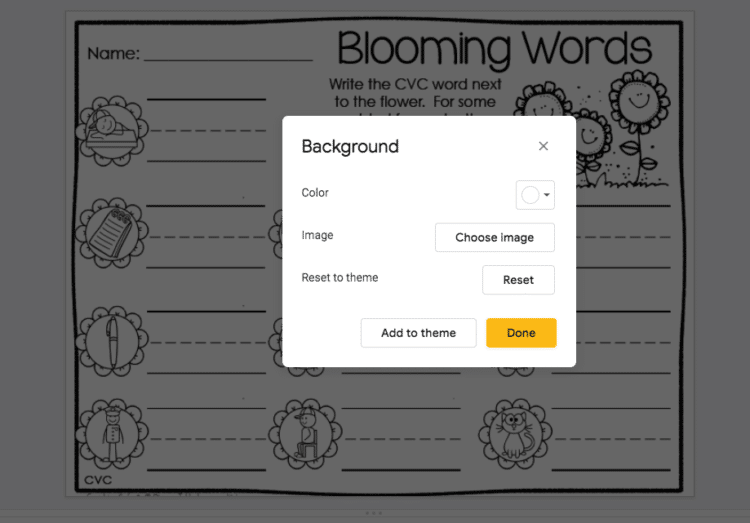
Step 6
The background is now locked and the image can not be moved. Now you can add text boxes for your students to complete on top of each answer space.
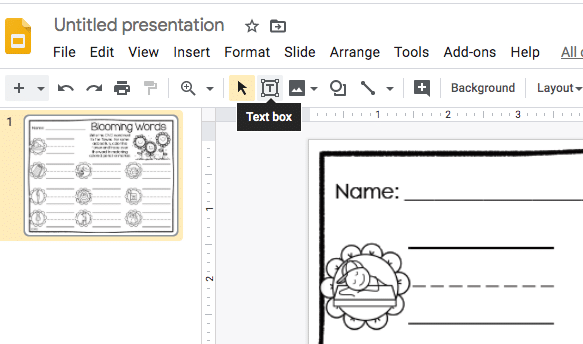
You will want to make sure you adjust the font and size to fit the space.
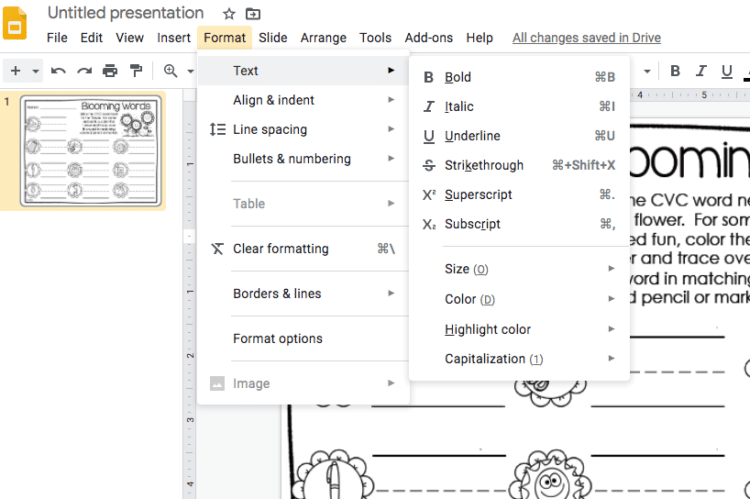
Once I have the correct size and location of the first box, I simply copy and paste that same box to the rest of the document.
Step 7
Don’t forget to save the document. It’s now ready to be used as you need. You can create a sharable link to this document and your students will be able to open it up and click on the text box to answer.
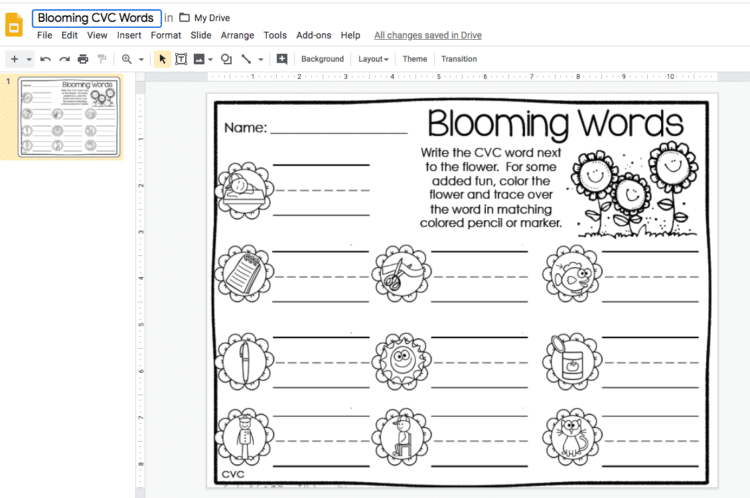
And that’s it. I’m hoping this is helpful and that you can find some new ways to use existing documents and packets you already have. If there is anything else I can do to help during this time, please let me know. If I don’t know the answer, I’m sure I can find someone who does.



Leave a Reply