I know that as soon as I hit publish for this post I’m going to start getting emails asking when I’ll have my plans done for March, but honestly friends, I’m working on it. It has just been a crazy month with kindergarten assessments, snow days, mass amount of kids absent from class and report cards. I’m hoping things will calm down a bit and that I’ll have March done a bit ahead of time. As it is, I still have two or three days left of January morning stations left before I will switch mine over, so here are my stations that I have staged and ready to switch over as soon as I can.
I hope you’ll be able to find some fun ideas to incorporate or tweak for your own classrooms. I have a few free printables that might be helpful. You can pick those up at the very end of this post. Look for the button and click on it. Also, if you have questions or want information on any of the activities here, please just click on the pictures or the linked text and it will direct you.

Please note, this post does include affiliate links.
If you aren’t familiar with Fine Motor Morning Work Stations, please click HERE to see how I set them up and use them in my classroom. I post these ideas every month so check back often.
Station 1: Key To My Heart
Anytime I can incorporate sensory activities with fine motor, it’s like a two-fer! I know that my students are going to be just THAT much more engaged and that I’m going to have a station my students will want to come back to visit over and over again.

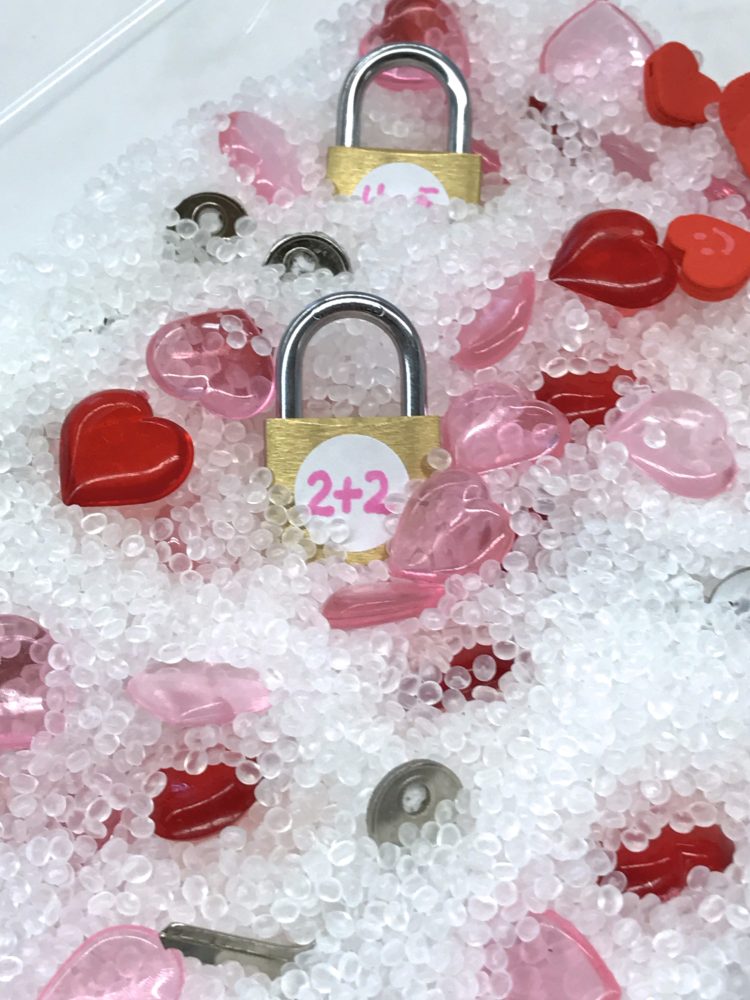
This station actually has some extended play to it. You will notice the hidden lock and keys that are mixed among the sensory filler of plastic pellets (the kind you use in dolls) and acrylic hearts. I love locks and keys for fine motor work. I include these in my own Take Home Fine Motor Kits that I have blogged about in the past. The thing to remember when getting locks and keys, however, is to make sure that, if you buy them in a set, that all the keys do not open all the locks. I actually like to ask parents for them as part of my wish list. That way I am certain to get locks from different places that will not have the same keys.
These are the ‘main’ activity for this station. Students select a lock using the chopsticks I have placed in the bin and then search for the ‘answer’ key. The keys may have a number word, tally marks or dots on them to indicate a number. If the number matches and the answer is correct, it should open the lock.
I love that this works their fine motor muscles by twisting locks, but also the ‘trainer’ type chopsticks are a good ‘pincer’ tool for searching for the missing keys.
Extending this activity . . .
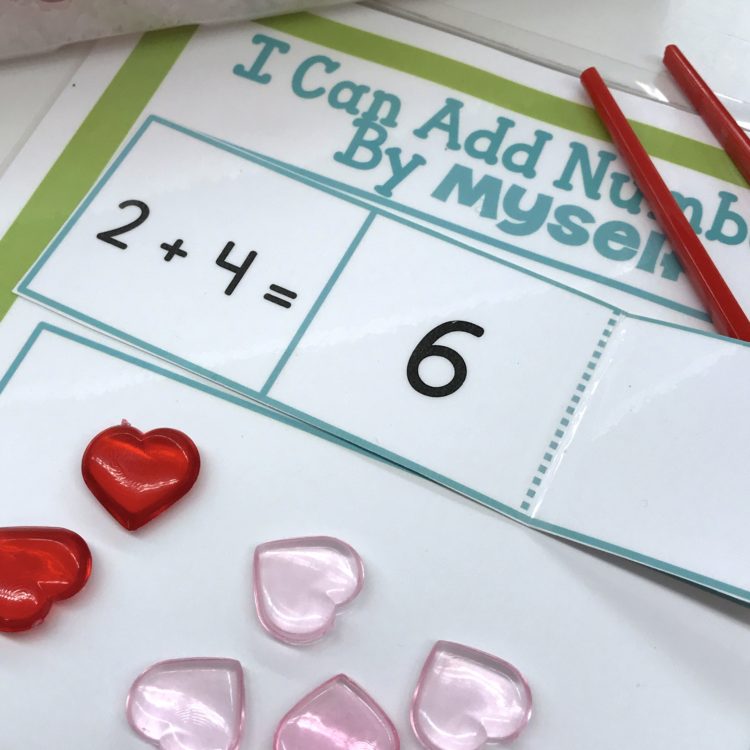
There is really so many ways you could extend this activity. You could write nonsense works on the acrylic hearts and have them sort them, scoop and graph the hearts or even play a greater/less than game, however, I really want my students to work on some other math skills, so I have included this self-correcting addition mat and cards that will allow my students to keep working once the keys are all unlocked.
Because so many of my students are working on addition, I will have two differentiated sets of addition self-correcting cards for this activity. These mats and self-correcting cards are part of my I CAN DO IT MYSELF series. The fact that they are ‘generic’ lends itself well to this activity, because I can really use any manipulative I have on hand . . . mini erasers, cars, buttons, or, in this case, acrylic hearts.
Students select a card, represent the equation by collecting different colored hearts from the sensory bin with their chopsticks and then write the equation and answer.
When they open the card, they get immediate feedback as to whether their answer is correct or not.
Please note: This example shows cards for 0-10 addition, but I will also offer 0-5 addition for some of my students. For my students who are not ready for this quite yet, I have a counting on from teen numbers mat and self-correcting cards that they will be using.
Station 2:
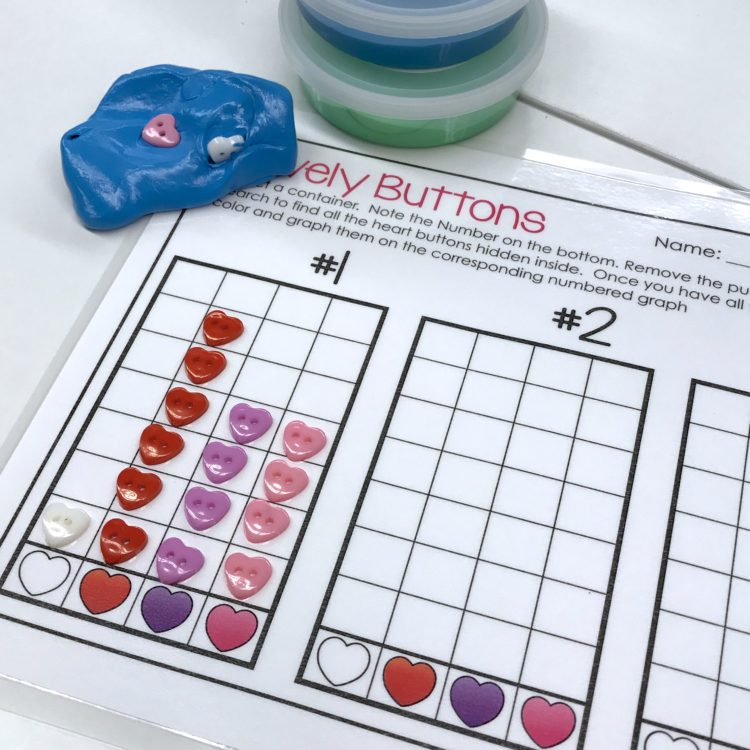
Therapy putty is back. But the ‘soft’ is gone. It’s too easy, and I need my kinders really working those muscles in their hands and their heads. So this time I found these little colored heart buttons in the Target $1.00 bins and knew they would be perfect for putty work. It’s not enough to just secure the buttons anymore, however. Now I like to have my students interacting with the materials they find.
I put together this little graphing page that you can download for free at the end of this post. It will let your students collect, sort and count what they find.
Station 3:
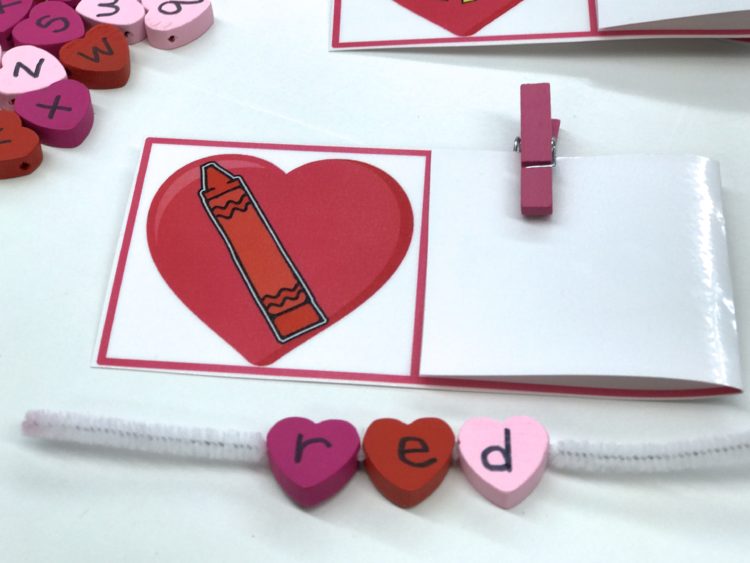
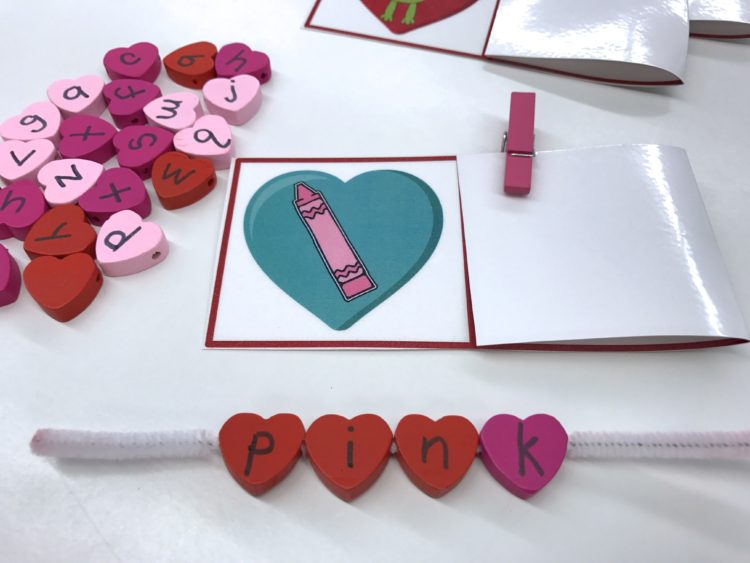
Making words is a daily activity in kindergarten these days, so I knew I needed to incorporate some kind of activity that would get them making words but working those fingers, too. I found some wooden heart beads and ‘selected’ the colors that would be fun for February. Then I simply used a Sharpie to write letters on the beads.
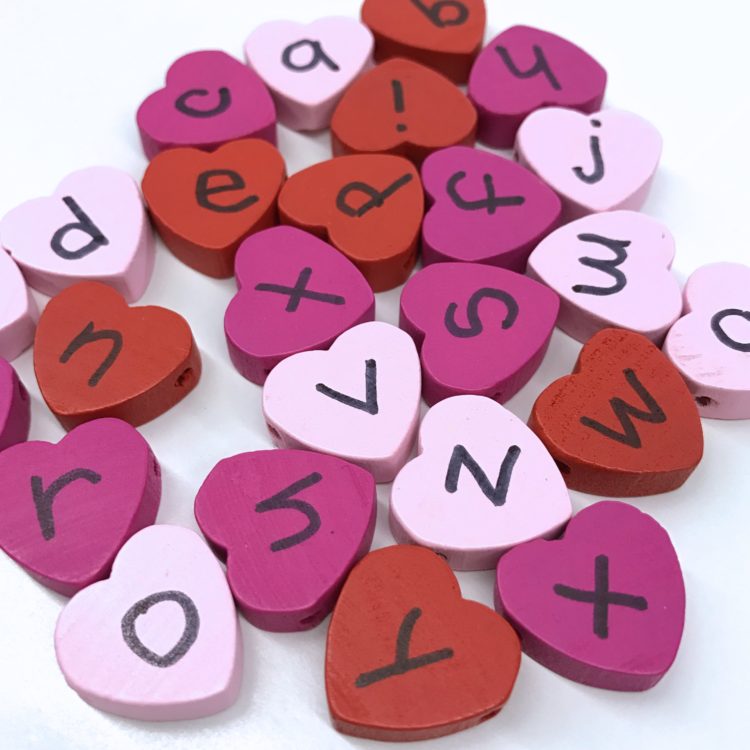
My best bit of advice for using beads of any kind in your class is to consider using a pipe cleaner for stringing versus yarn or plastic lace. It is just easier to manipulate. They still need that precious hand-eye coordination, but the letters stay in place and it eliminates some avoidable frustration on the part of your little ones.
These self-correcting cards are from my February Word Work Stations Galore set, and they make this activity super independent. Students select a card, produce the words using the beads . . .
. . . and then open the card to see if they are correct. Instant feedback.
I know that all my kinders are not on the same level with this skill, so I also have some cards with CVCC/CCVC words like the ones below.
It’s the same concept, it just challenges those students you have that are ready to expand their skills.
But, of course, in my class, I also have those students that need more work on beginning letter sounds. So for them, I also have beginning letter sounds self-correcting cards, too.
If you’d like to find out more about these cards, you can click on any of the pictures above.
Station 4: Lovely Sweet Pieces
Ok, so when I went to Target about 3 weeks ago in search of mini-erasers for this post of which I found NONE, I did find these lovely little gems. These little erasers that are also puzzles are perfect for our morning work stations.
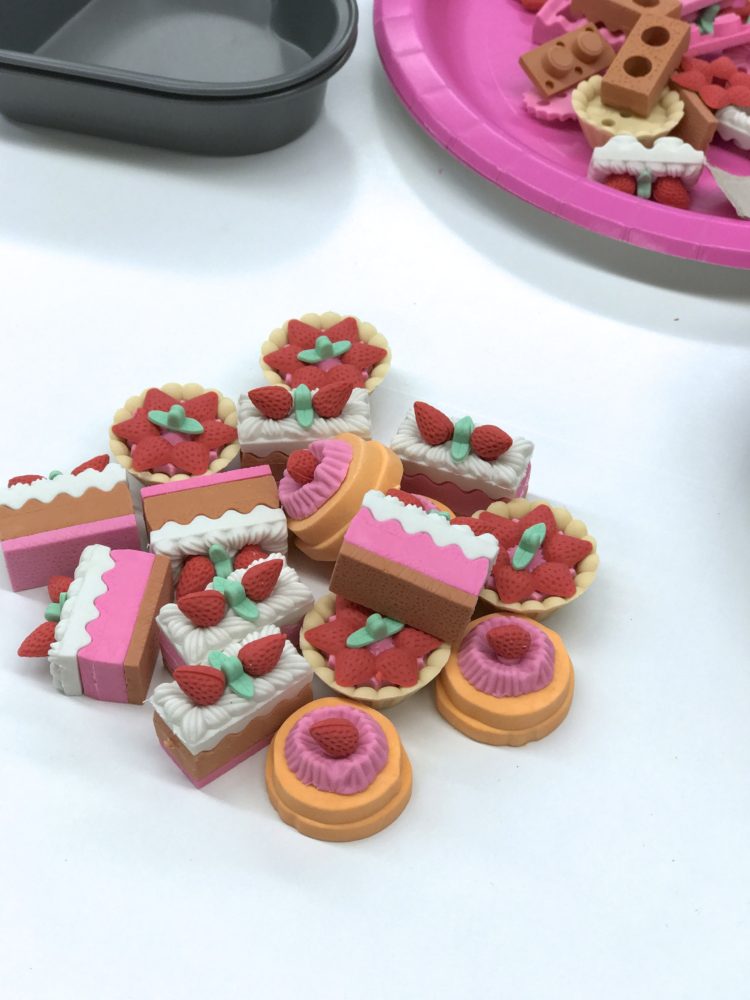
Students will need to roll a die to collect pieces of the sweet treats. From the pieces they collect, the object of the game is to see how many completed pieces they can create. I will have a sample of what each piece looks like for their reference, but other than that, it will be up to them to figure out how they piece together.
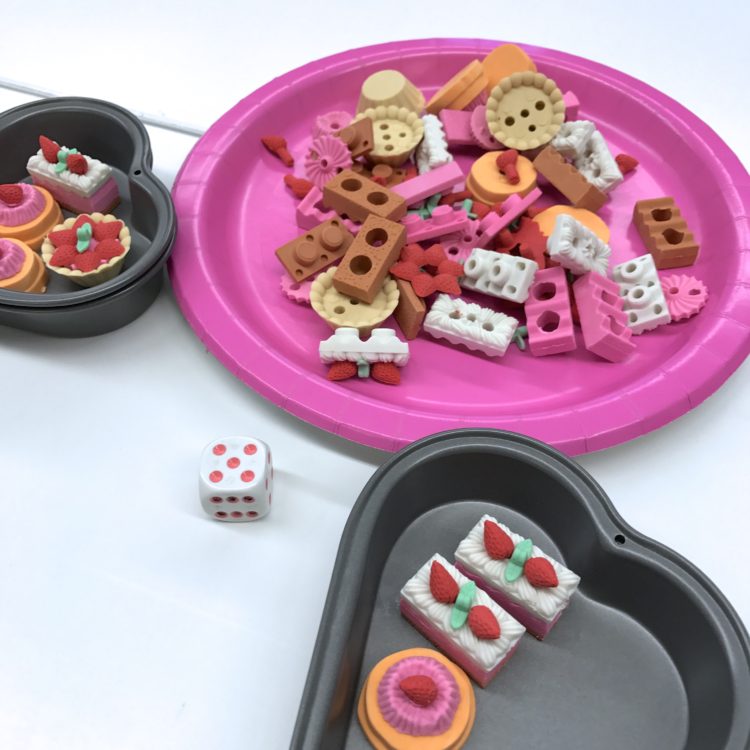
Pieces that they complete will be stored in these sweet little mini heart cake pans. The player with the most completed sweets is the winner.
Station 5: Having A Ball with Greater/Less Than
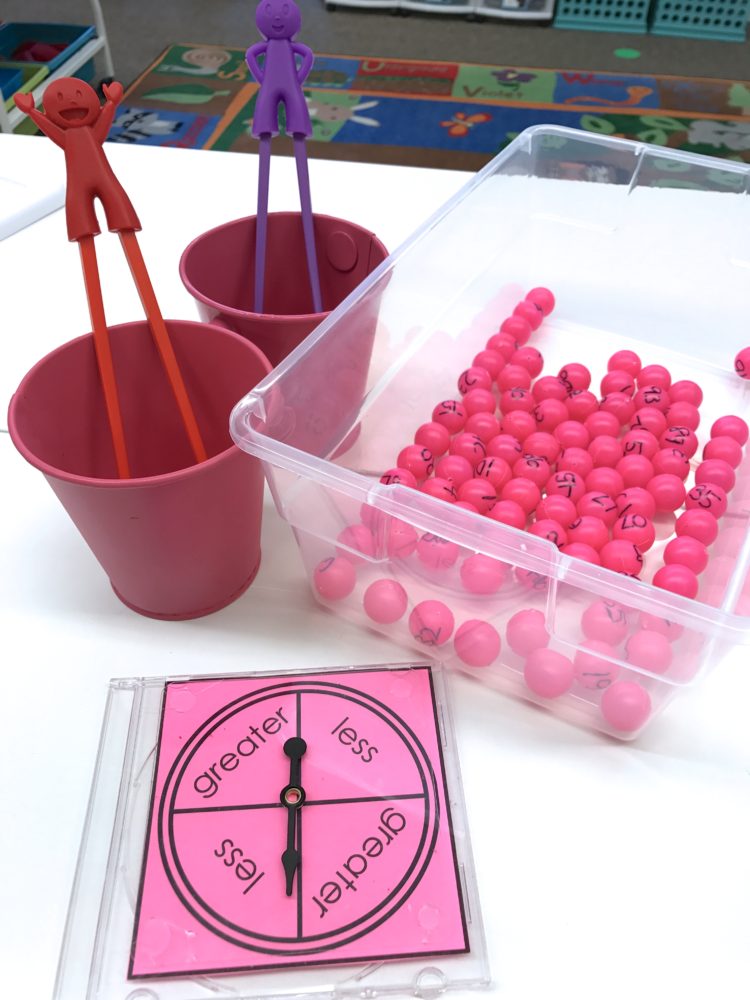
Yes! These are mini ping pong balls and yes they are pink! I love them, and I already have green ones for March too. My students have loved working with ping pong balls, and I wanted to try something a little different from when they used those huge grabbers from the Dollar Tree last month. So here’s what I came up with for February.
They are already familiar with this game on a bigger scale, so this one should be fairly easy for them to pick up. Basically, what will happen is that they will use these sweet little ‘training’ chopsticks to choose a ball from the bin. They need to identify the number on the ball before the spinner is spun. Once the players know their numbers, the spinner is used to determine whether the greater or less number wins both balls.
The player with the most balls in their container, is the winner.
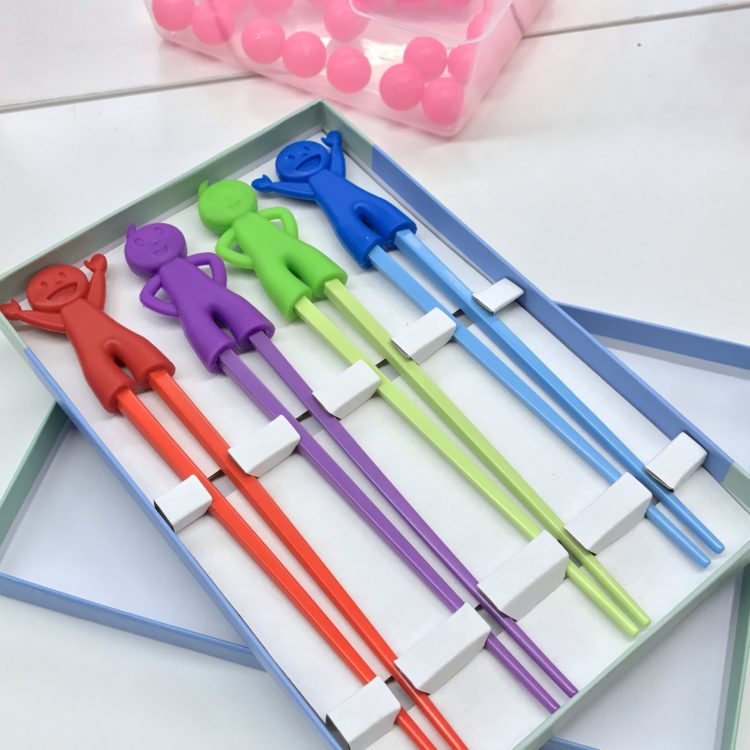
And because I know I am going to get asked, these little guys are called ‘Sumo Sticks.’ I got them off from Amazon and you can click the picture below to see them or click HERE. I’m going to warn you, they aren’t cheap, but I had them for my sons and loved them so. I just had to get them. I am sure you can find trainer sticks at a World Market or some other place like that if you have the time to go searching.
Station 6: Love to Spin and Color
I always chose a Spin and Color activity, because I feel like kindergarten friends just don’t get enough time to color. Seriously! I know you probably think I’m crazy, but I catch my kids wanting to color all the time. It’s why I have Edit It Color by Sight Word items in my sight word stations and it’s why I do these activities. Plus it is super easy to differentiate this activity. Just stick a different level or skill and the corresponding spinner card in a poly envelope with the corresponding colored sticker and you are differentiating.
If you’d like to find out more about spinners and spinner activities, you can see my posts HERE.
Remember the easiest way to trade those spinners in and out is to use an old CD case, hot glue your transparent spinner and TA-DAH. You just open the case and slide in your spinner card. Easy Peasy . . . even your kinders can do it. You can find transparent spinners on Amazon for pretty cheap. I have tons!
Station 7: Pokey Pin Love
Pokey pins are a staple. Must have them. Such an easy station and my kinders love poking and seeing the finished product. If you haven’t tried pokey pins, these are from Mrs. Miner’s Monkey Business’ Valentine Set. You simply copy the graphic and then staple it to a colorful (In this case, you know I’m going to use ASTROBRIGHTS® Papers. It’s the BEST!) piece of paper and students poke away until they have created the image on the front. Then remove the staples and there you have it. If you would like to know more about Krissy Miner’s amazing pokey pin packs, you can click on the photo below.
Station 8: Snap Cube Love
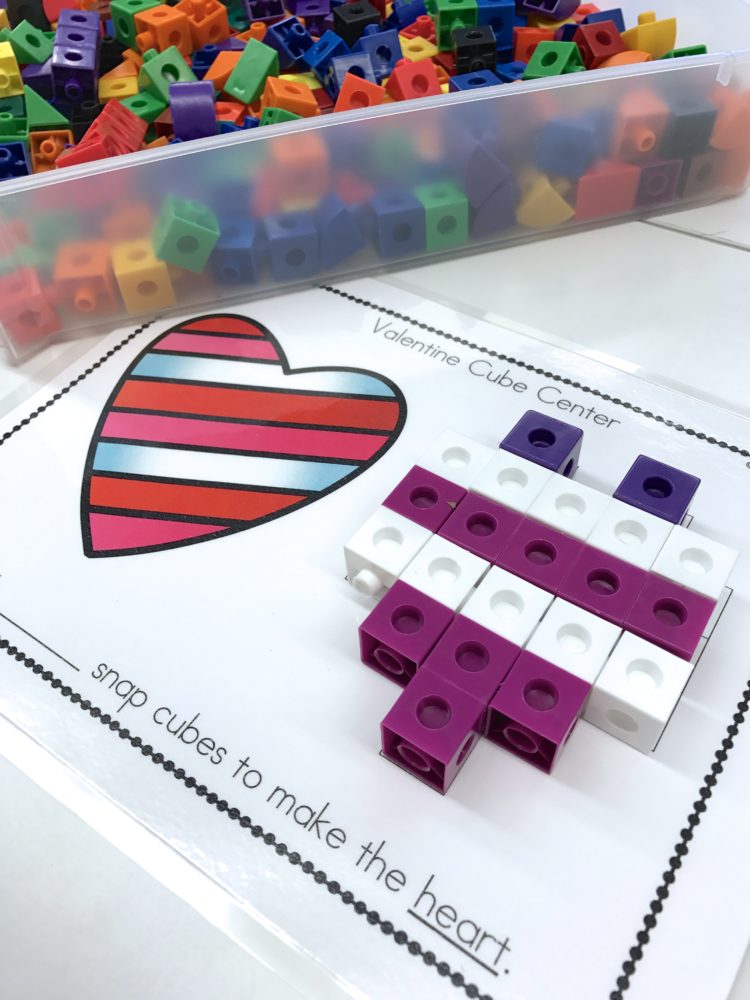
Snap cubes are so good for fine motor strength and dexterity, and no one does snap cube activities better than Simply Kinder. These are all Valentine themed and perfect for February stations. Students create the image with snap cubes using the guide and then count and write the number of cubes they used to create it. It’s great fun and, yes, there is a guide so your students aren’t completely on their own to figure out how to make a heart.
If you’d like to find out more, just click on the picture below.
Station 9: Lovely Water Beads
So I saw a pin by Little Bins for Little Hands using water beads, and I knew I needed to find a way to make it challenging and engaging for my own kinders.
I mean, have you tried using these things in your class. For years, I have had them in my sensory bins and they are always a favorite, but to incorporate fine motor and math was a bonus. The only thing that might make it better would be to add a light table, which is exactly what I did.
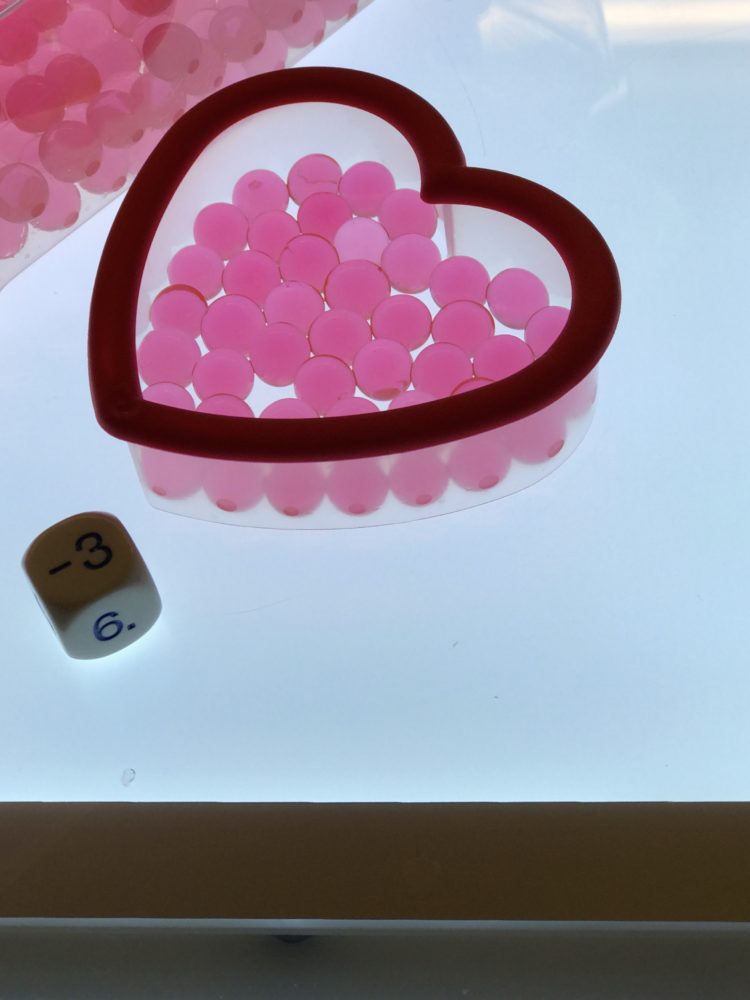
So the object of his activity was to roll a die (In this case, because my kinders are working on adding and subtracting, I used this die that has numbers and negative numbers on it.), students identify the number on the die and add that many water beads to their cookie cutter heart. The first one to fill the bottom of their heart, wins. However, because this is a die that includes minus numbers, if they roll that number, of course, they would need to subtract that number and return those beads to the sensory bin.

So where can you get all those pink water beads? Well on Amazon, of course. Just click HERE! But quite honestly, I went to Dollar Tree and bought a bunch of their multicolored packs and had the boys sort out all the pink ones. Now I have enough to use the green and yellow ones next month if I need. Yes really! The Dollar Tree!
And because I know you are going to ask, this is my light table. I used to have an enormous, handmade one for years, but it took up so much space I had to give it away. So I downsized to a smaller, thinner, lightweight one that I am LOVING. I included a picture of the brand above in case you’re looking for one for your own classroom. Just click on the picture if you want more information. (I’ll be writing more about my light table in a later post. My students have been loving it.)
Station 10: Adding Up Hearts
I think everyone has a set of these heart containers in their Valentine’s supplies. I know I have had these forever, and I’m pretty sure that the Dollar Tree still carries them a 100 years later. The best part about them is that because they come in different shades of pink, you can totally and easily differentiate this activity.
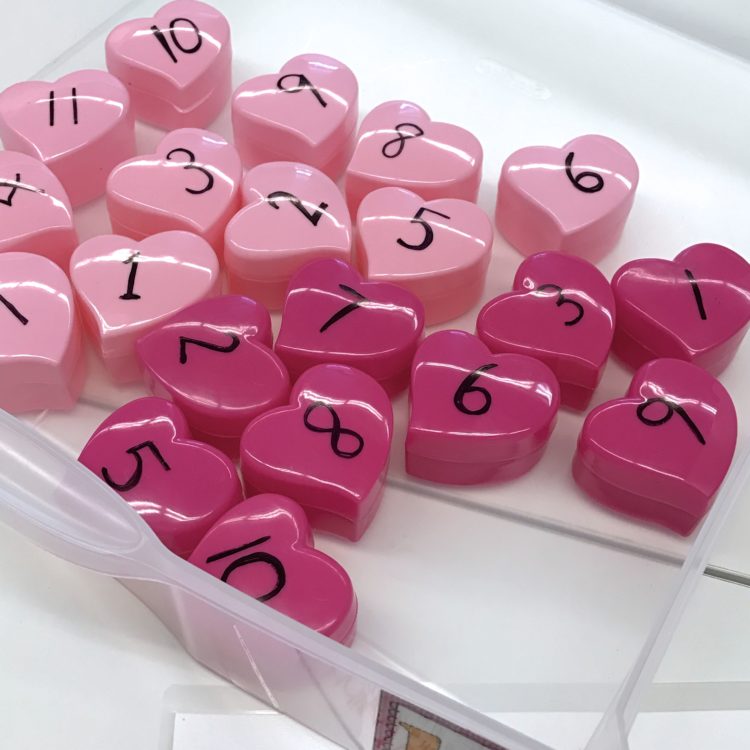
So for instance, this bright pink set of containers holds a combination of purple and pink foam heart beads (I got these at Oriental Trading a bazillion years ago. If they don’t carry them you can get some like it HERE.) that add up to a number between 0-10. The lighter pink containers are for adding numbers 0-5.
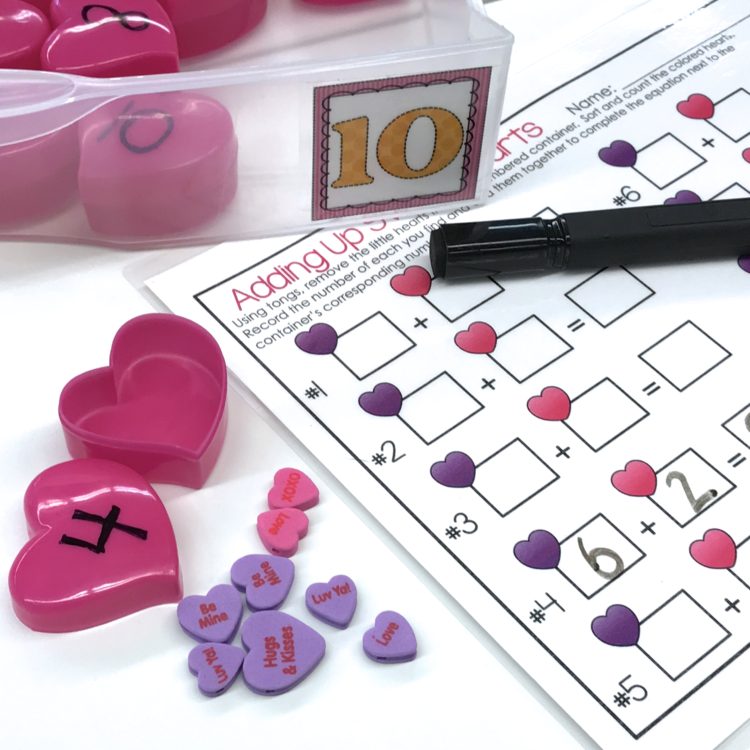
Students will open their container and use tongs (or chopsticks) to take the items out. They then sort the hearts by color, write the equation next to the corresponding number on the response sheet and complete the equation by writing the answer.
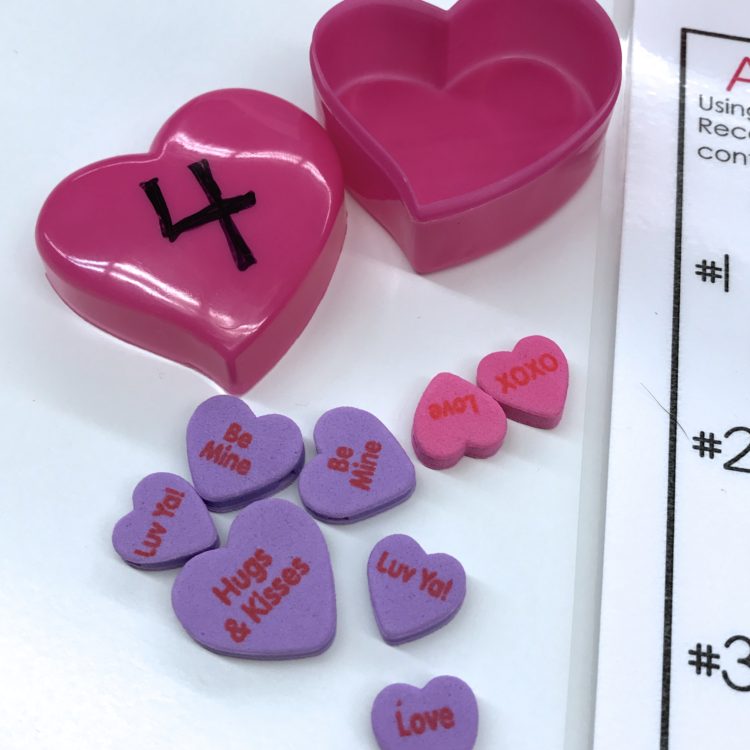
Of course, you can use little colored heart pony beads if they are more readily available to you. I just used these, because I’m a believer of using what you have on hand.

And if you need a copy of this response sheet for yourself, please feel free to grab it at the bottom of this post.
Station 11: Lovely Heart Addition
I love giving my kinders beautiful bright Astrobrights Paper and paper hole punches.
You may remember me using Astrobrights Papers and these very same hole punchers for another project in my class. This post below shows how I use them earlier in the year . . .
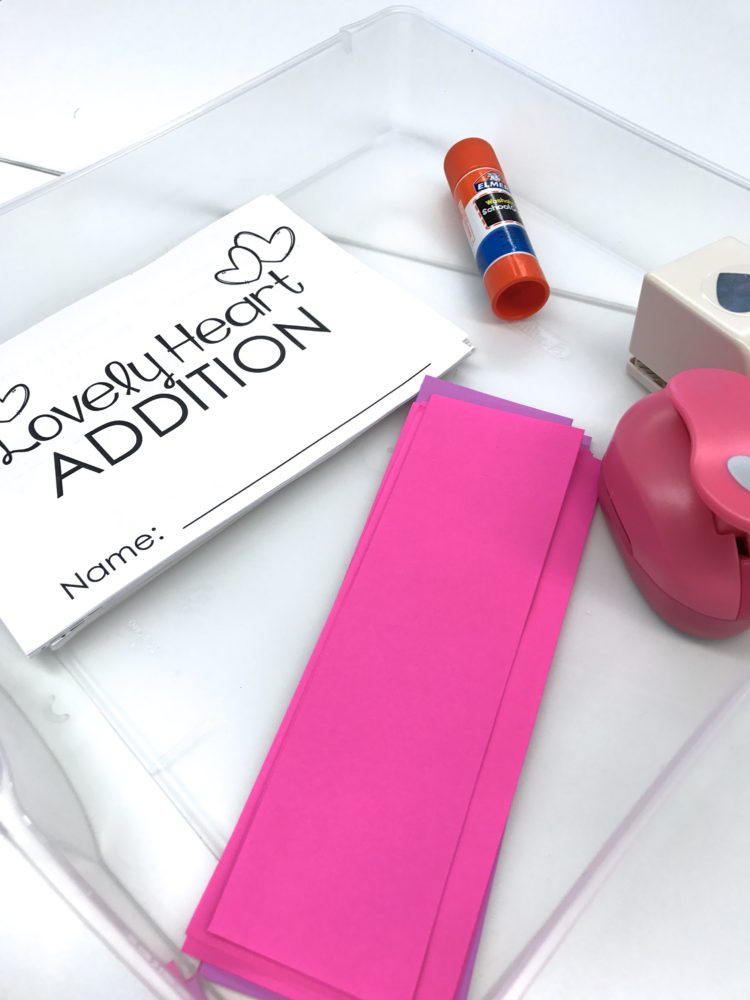
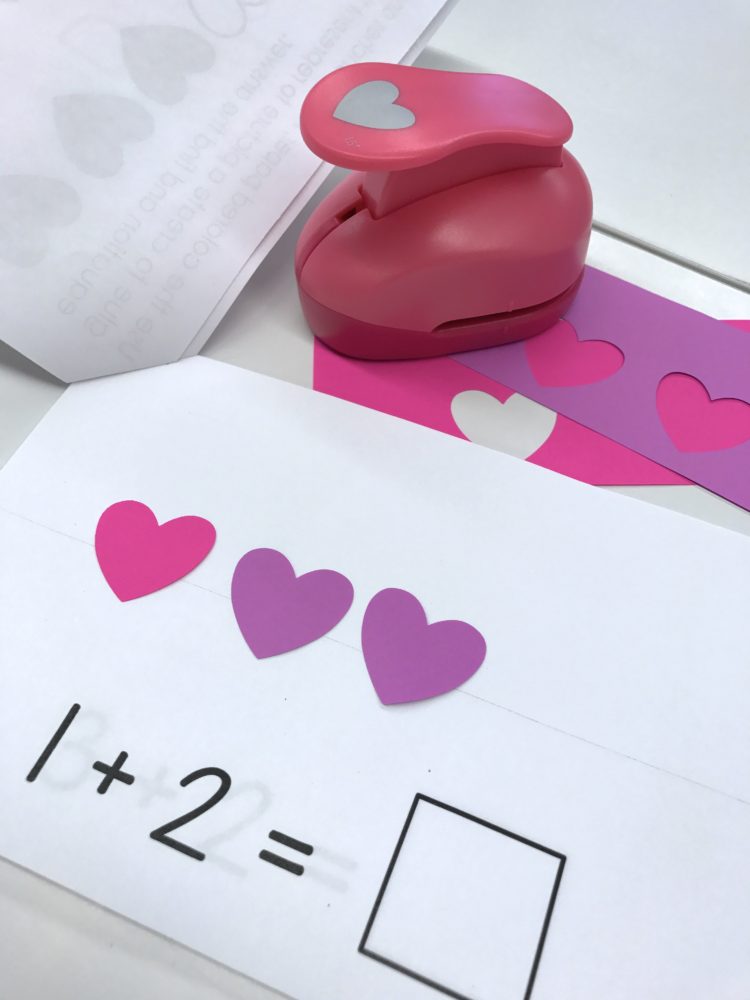
but for this activity, I wanted to give my students and chance to work on representing addition skills while incorporating a little fine motor fun. So I created these little books for them to use. The first page demonstrates how they should use two colored hearts to represent their equation.
Students then use the Astrobrights Paper to punch out hearts in two colors, glue the correct number of each to the book and complete the equation. Of course, I have this booklet for you to grab. It includes several pages and options for addition 0-5 or 0-10. You chose the addition problems you want and include the number of pages you need to create your own book. I created two sets. One set will be for my students working with 0-5 and the other for students working on 0-10.
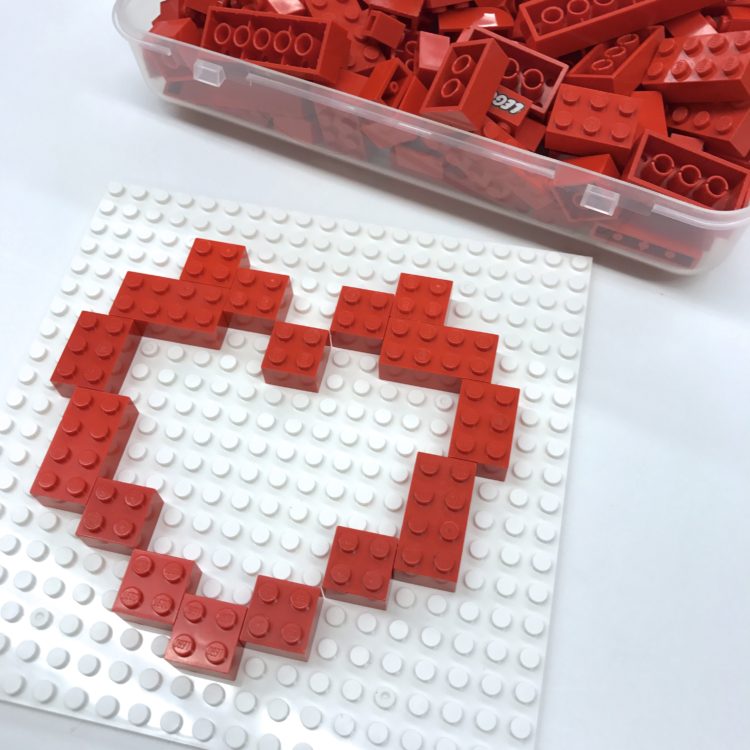
Station 12: Who doesn’t love Legos?
Little Bins for Little Hands has such great ideas for fine motor and some SWEET Lego Valentine ideas as well. That’s where I got the idea to challenge me students to make a Lego heart.
I used these white building mats and will have students create their heart and then use the remaining pieces to attempt to complete and fill the heart.
It will definitely be a challenge, but we have been doing so much work with mazes and Legos lately that I think they will be up to the challenge.
Plus when they are done, they can always take out the inside pieces and make a heart maze like the ones also on Little Bins for Little Hands. (I’m telling you–she’s the Lego and fine motor BOMB!)
And just in case you need an extra one . . .
Counting Your Hearts
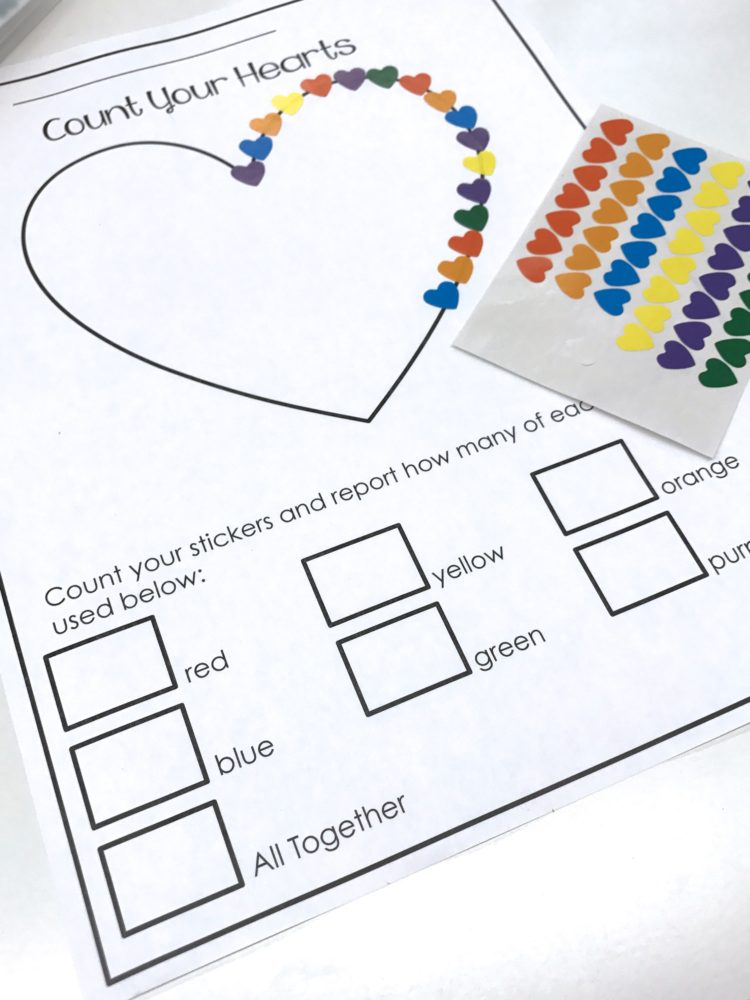
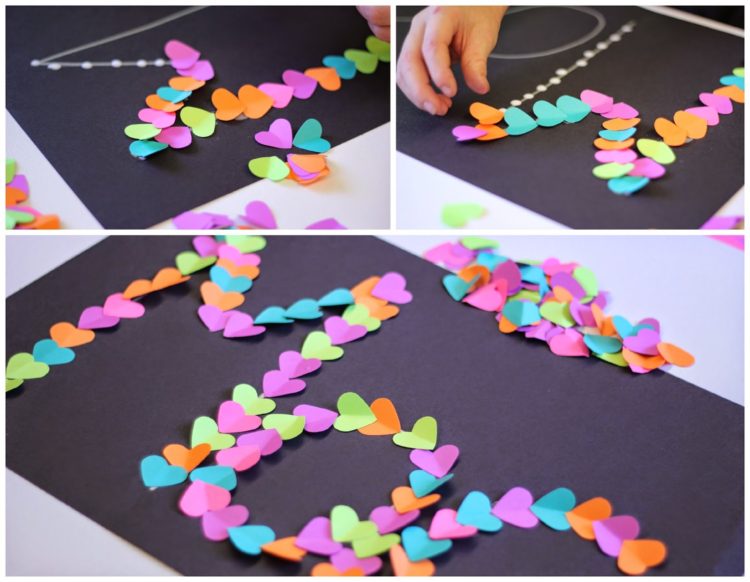
Stimulating Learning With Rachel had a post a while ago where she outlined all the different and fun learning activities she had for students in the UK. She had her little nursery friends outlining a heart with stickers. It’s such a simple idea. Brilliant actually! But I needed to take it to the next level for my kinders.

Granted, pealing those teeny tiny stickers off from their sheet is a challenge in itself, but I wanted my students to report back, how many of each color they used and then the total. We have been working on color words lately, so this was really timely.
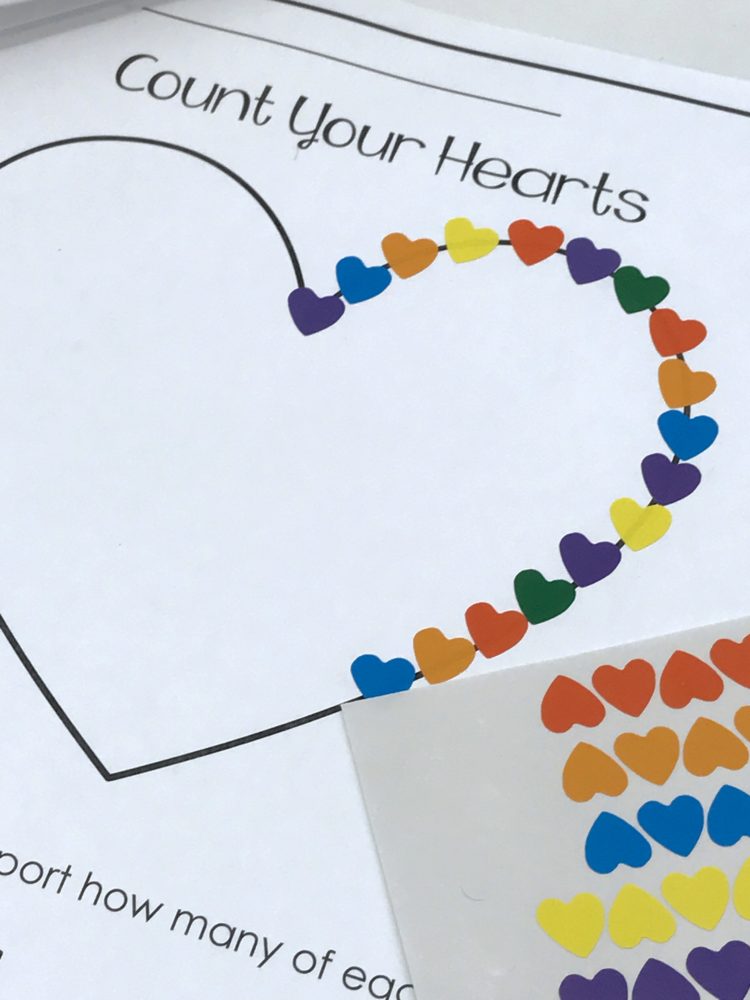
Even though I will be using these heart stickers, you could really use any sticker as long as it came in all these colors. Of course, this sheet is also available as part of the FREE printable packs I have at the bottom of the post. Please feel free to grab it.
So there you have it. My plans for February Fine Motor Morning Work. Of course, if you need the printables that I indicated were available for free above (not all of them are), please click on the button below. You will enter your email address (Please try to use an address other than your school one. School email servers sometimes block these kinds of emails) and a verification not will be sent to your inbox. If you don’t see it there, check your SPAM folder. Once you verify your subscription to my mailing address, the file will be downloaded to your computer. Just check your computer’s ‘download file’ and you’ll find it there. These are just of few of the many stations that I use. You can see an even more extended version of Morning Work Stations by clicking HERE!
As always, drop me a line if you have any questions. And I promise . . . I get started on March just as soon as I can.
UPDATE: After spending the last year posting about morning work and presenting workshops to teachers across the country, I had numerous special requests from teachers who required more than just 12 stations, ‘I Can’ sheets with standards and skills indicated and who had numerous questions. Taking all those requests and questions, I put together a Getting Started With Morning Stations packet and now an expanded October, November, December, January and February Morning Work Station packet with over 35 Morning Work Station Activities. If you’d like to learn more about the getting started packet, just click HERE. Or click on the picture below to find out more about February.














Wow! You did it again! These are amazing. I only teach literacy so if anyone has ideas about how to tweak some of the math ones to teach reading instead, let me know.
Nicole, for the key activity you could do rhyming words or onset/rime.
Marsha, thanks so much for sharing all of your creative and fun ideas. I’m currently teaching preschool 4’s but these activities are easily differentiated for them. My kiddos especially love using the tongs to search for things but I have a feeling the light table and water beads would put them over the moon! Thanks again!
Thank you so much!!!! I love these and so do my kinders!
I love all these ideas. All of your ideas and activities have helped me go from a good teacher this year to a fantabulistic teacher!!! I appreciate all the time and effort all this takes to get together each month!
Awesome!! How do you think of these activities?! 🙂
Thanks Marsha for sharing these great activities. I set mine up on Monday since we finished our January ones a bit early. I look for combining some of my ideas with yours and now am on the search for some of those great chopsticks. I still am wondering if your district pays for the many things you have to purchase for these fine motor activities or if it is all out of your pocket. Hopefully by next year I won’t have to invest so much money each month into these activities, I am even considering writing a grant. Thanks for always giving the information where you purchase things, I appreciate the links. So of course I have to ask where did you find the heart stickers? Love that activity, I will probably do it whole group with my class. Such fun!
Thank you. I have stared using the morning work bins. I started out small and every month I have added a new drawer. Great.
Just wanted to let you know that your fine motor morning work centers are really top-notch! I am not one that is easily impressed because I am a bit of an over achiever myself, but I must say my 10 year old son and I get so excited towards the end of every month awaiting a post from you with your new month’s round-up. My son is medically fragile and 10 years old but he wishes that his teachers would do something like this too. He helps me tweak and find supplies for my Kinders! Thank you so very much!
These are great…engaging, fun, and full of fine motor and learning opportunities. Thank you for taking the time to share! I have one question…I love using the water beads in my sensory table but they/the water always ends up getting stinky after a few days. Do you have that issue? If you have, have you figured out a way around it? Thank you!
Gotta tell ya I did the snowman parts in dough and then the graphing sheets…the kinders couldn’t stop saying, “this is so fun!” Awesome activity and I had already planned some pink dough and objects for February. Fab! Thank you!
I want to know how you store all of the sensory centers things you have? Do you have a plastic bin for each one? How do you store all of your centers? This new teacher needs organization help!
I recently found your blog and great ideas for fine motor morning work. I just set up some fine motor morning work centers last weekend and used a small afternoon block of time to teach my kiddos how to use them. I will roll them out as morning work on Monday. The kiddos are so excited and I’m so glad that I found this amazing resource.