Using Color To Help You Tier Differentiated Activities.

Before I talk to you a bit about how I tier my activities by color. I always think it’s important to preface things with a little review. Some of you have seen some of this so you can just skip over this first part. I never know who is going to stumble upon my differentiated ramblings without having ever seen my previous posts. So, that being said, bear with me for a moment…


NOW YOU CAN START THE PROCESS OF PLANNING A TIERED LESSON
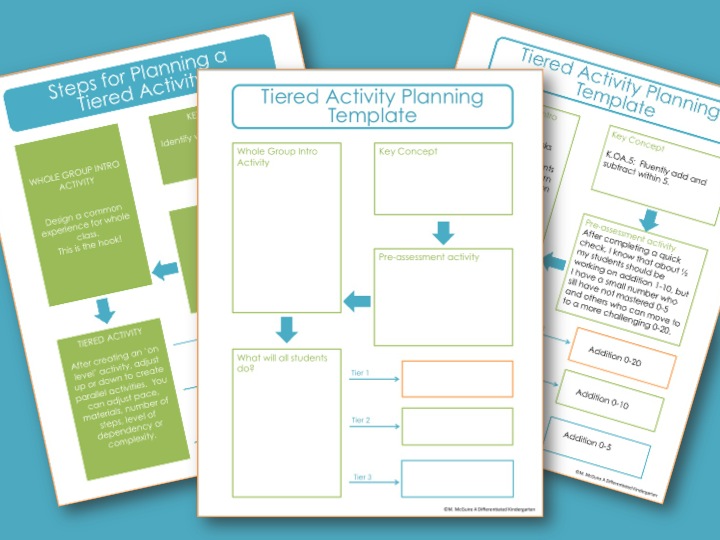
Below you’ll see the steps for tiering an activity along with a simple example.

And the example:
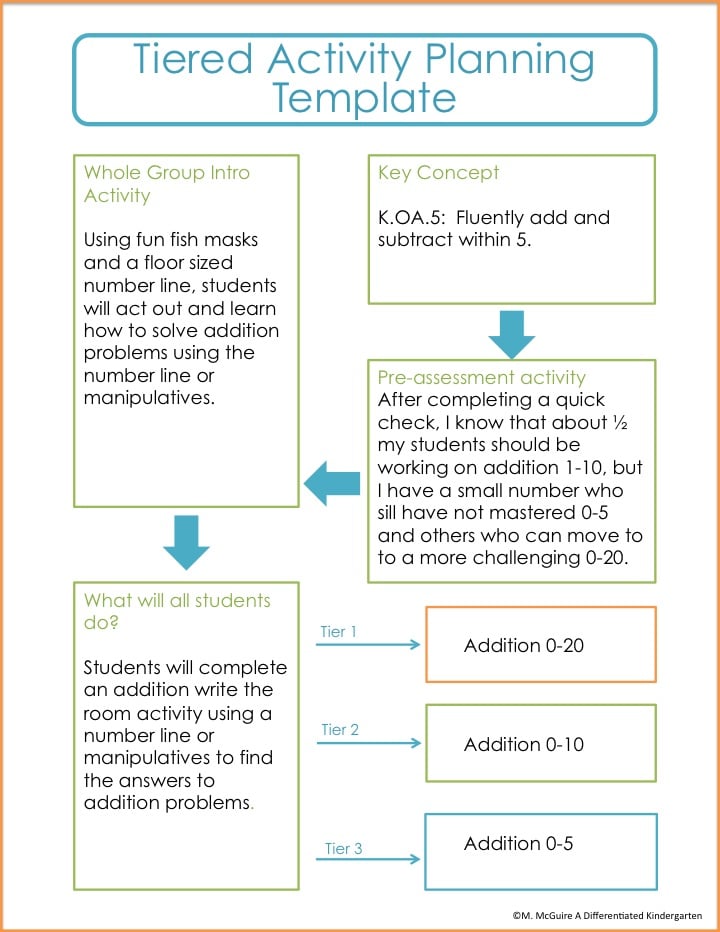
I have had so many people ask me for a blank one of these that I went ahead and made an editable one. It’s not very practical to complete one of these for every center or station activity that you do, but actually going through it step by step for a couple of activities may help you get so that it becomes second nature when planning. (Click on the picture if you’d like an editable copy.)


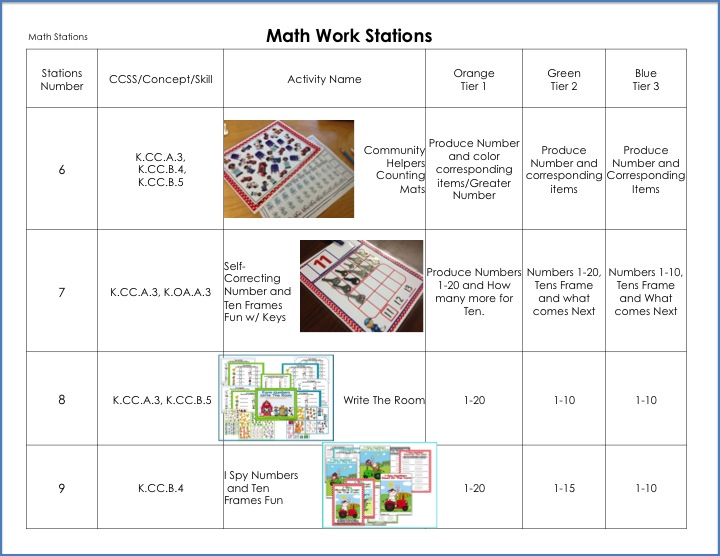
Now if you remember correctly, I have nine stations ready to go, but only 6 stations are being used at any given time. I have no more than four students at a station at a time. Each day that we do stations, we attend two. Each station lasts about 20 minutes. When the 20 minutes are up, we clean up and move to the next station. (Station numbers move down the pocket chart.

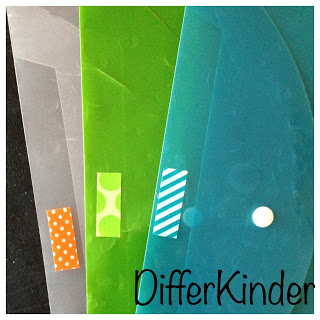
Inside each station drawer is an activity that may be tiered (or may not be because we don’t tier EVERYTHING…). Remember to start with only a couple of tiered activities to begin with so your students can slowly get accustomed to the routine. My tiered levels are color coded: orange, green and blue. I’ve been fortunate enough to never have a problem having a child that was color blind or who could not differentiate between the colors (which would be a huge issue), but if I did, I could always tier by patterns (stripes, dots or chevrons) or shapes or whatever was available.
When a student goes to a station, they look in the drawer and, if the activity is tiered, there will be activities stored in a color coded container of some kind. I use poly folders to hold tiered materials and place a small colored sticker or piece of washi tape to indicate the color.
I also use colored pencil bags for smaller items. But really, you could just use a ziploc bag with a colored dot sticker and it would do the same trick.

How does a student know which activity they should use? All they have to do is look for their name tag. If their name is on an orange tag, they use the activity stored in an orange coded container. If they are on a green tag, they use green and so on.
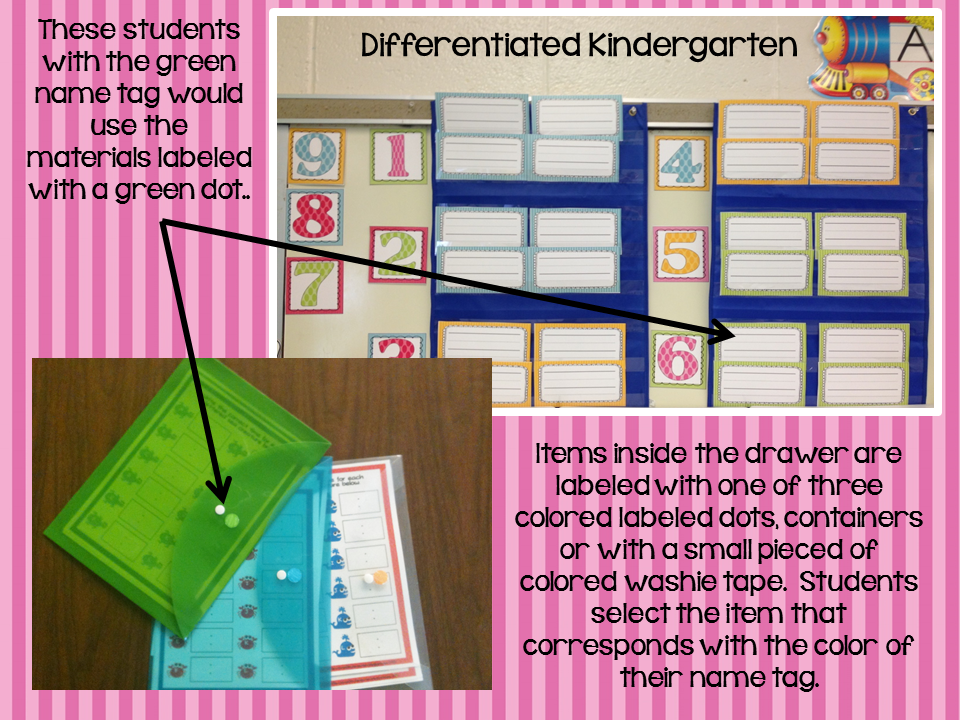
Here’s another important thing to note. All my name tags are laminated so that if I need to quickly change a student’s tier I can do so by erasing their name for instance on a green tag and placing it on a blue instead.
The other thing is that all the same colored tags need not be in the same group. I never set my groups up for math based only on ability. I can have two colors in the same group although I do like to make sure that everyone has at least on partner with the same color for any partner games.
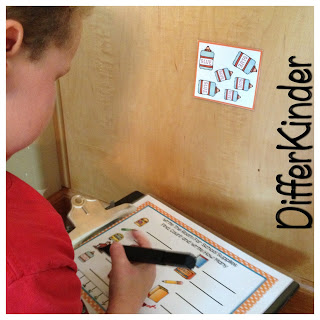
So for instance, if I had a group of students at the write the room station, even though they are all doing the same highly engaging activity(and desirable…kinders love to write the room), they are each doing it at their own level. Some may just be counting the items while others are counting the items AND then telling me the number that comes before and after.
So let’s consider those guidelines again, and ask the important questions:
Were the tasks in my lesson plans based on an essential skill or concept?

Yep. They were all aligned to a common core standard with the exception of patterning. Here’s where I am a bit of a rebel, because I think seeing and extending patterns are a precursor for so many other kinder skills that I will always have these kinds of activities at the beginning of the year.
Are the levels (tiers) based on on-going assessment?

They will be. I will use my Common Core Checklist data, observation notes and experiences to make sure all students are working at their readiness level.
Have I addressed different learning profiles and use various materials?

Hmmmm…I think I’m good here. What do you think?
Regardless of the level, are the tasks meaningful and engaging?
Yes. It wasn’t just a matter of giving more work to a set of students because their readiness level was higher than others or less work to those who were not as ready. Nor did only the students who were more advanced able to do the ‘fun’ stations or vice versa. Levels were designed to extend learning while allowing all students to complete the same engaging tasks.
I hope this makes sense. It’s always the one question I get over and over so I want to give everyone a little insight as to how I make it work for me. Make sure you leave me your thoughts. I’d love to hear other great ideas for organizing differentiated stations and centers.
Share This:

Marsha Moffit McGuire
Short little bio goes here. Short, sweet, and lets visitors know about your experience, expertise, etc.


Leave a Reply